Before delving into the article, please note that you should have basic knowledge about how to create a mule flow using Anypoint Studio and should at least have basic understanding of Maven and what is a Domain project. Also should be aware of basic concepts like “Code Coverage” and “Functional Testing”, though later is not much required.
You can get trial version of Anypoint Studio from MuleSoft’s website https://www.mulesoft.com/lp/dl/studio and read the blogs on how to setup Maven for running the Mavenized Mule projects.
In this article, we will go through
- Creation of a simple Mavenized Mule project
- Creation of a domain project
- Creation of a MUnit test
- Execute the tests from Anypoint Studio and from command prompt using Maven commands.
- Check the Code coverage of the flow
Tools used for this article:
Anypoint studio version 6.0.1 for Mac
Creating a simple Mavenized Mule project:
Click File ->New Mule Project and name your project (In the article it was named munittest) and check the option “Use Maven”.

Then add a simple flow with http endpoint and set a payload by dragging the elements from the “Mule Palette” on to the “Message flow”.
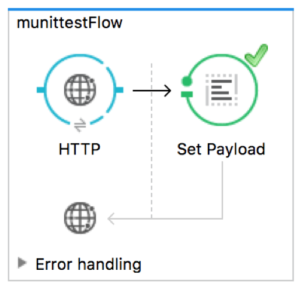
Corresponding Xml code:
<?xml version="1.0" encoding="UTF-8"?>

<mule xmlns:http="http://www.mulesoft.org/schema/mule/http"
xmlns="http://www.mulesoft.org/schema/mule/core"
xmlns:doc="http://www.mulesoft.org/schema/mule/documentation"
	xmlns:spring="http://www.springframework.org/schema/beans"
	xmlns:xsi="http://www.w3.org/2001/XMLSchema-instance"
	xsi:schemaLocation="http://www.springframework.org/schema/beans http://www.springframework.org/schema/beans/spring-beans-current.xsd
http://www.mulesoft.org/schema/mule/core http://www.mulesoft.org/schema/mule/core/current/mule.xsd
http://www.mulesoft.org/schema/mule/http http://www.mulesoft.org/schema/mule/http/current/mule-http.xsd">

<!-- The following configuration will be moved to domain in order for reusing
the same configuration across all the apps -->
    <http:listener-config name="HTTP_Listener_Configuration"
		host="0.0.0.0" port="8081" doc:name="HTTP Listener Configuration" />

    <flow name="munittestFlow">
        <http:listener config-ref="HTTP_Listener_Configuration" path="/" doc:name="HTTP"/>
        <set-payload value="Hello World!!!" doc:name="Set Payload"/>
    </flow>
</mule>
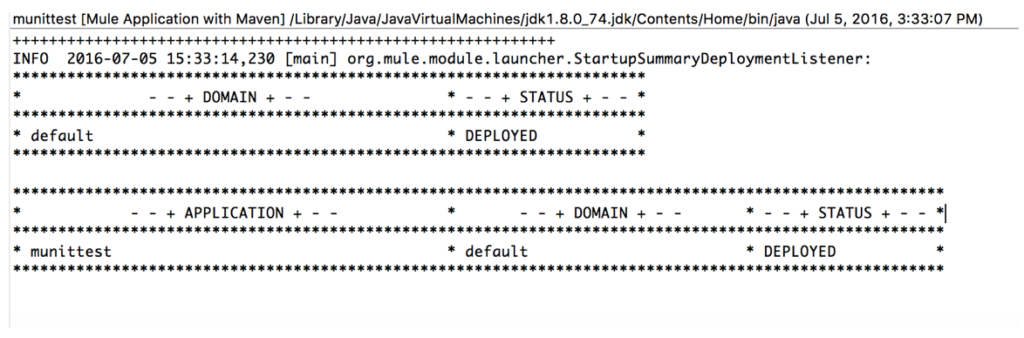
Now run your project and you should see the project status as deployed (Right click on the project and click “Run As” and select “Mule Application With Maven”) in the Console window.
Now browse the endpoint http://localhost:8081 and you should see “Hello World!!!” displayed on the browser.
Since this project worked successfully, let’s move the listener configuration from the munittest.xml to the domain project by creating the domain project.
Creating a Mule Domain project:
Click File->New->mule Domain Project and check the option “Use Maven” and then go the file mule-domain-config.xml file which is available in the folder “src/main/domain”.
In this article, I have named the domain project as “testdomain”.
Now remove the following configuration from the flow “munnittest.xml and add it to the mule-domain-config.xml and it should now look as below:
<?xml version="1.0" encoding="UTF-8"?>
<domain:mule-domain xmlns:http="http://www.mulesoft.org/schema/mule/http"
	xmlns="http://www.mulesoft.org/schema/mule/core" xmlns:domain="http://www.mulesoft.org/schema/mule/ee/domain"
	xmlns:xsi="http://www.w3.org/2001/XMLSchema-instance" xmlns:spring="http://www.springframework.org/schema/beans"
	xmlns:doc="http://www.mulesoft.org/schema/mule/documentation"
	xsi:schemaLocation="
               http://www.mulesoft.org/schema/mule/core http://www.mulesoft.org/schema/mule/core/current/mule.xsd
               http://www.springframework.org/schema/beans http://www.springframework.org/schema/beans/spring-beans-current.xsd
			   http://www.mulesoft.org/schema/mule/http http://www.mulesoft.org/schema/mule/http/current/mule-http.xsd
               http://www.mulesoft.org/schema/mule/ee/domain http://www.mulesoft.org/schema/mule/ee/domain/current/mule-domain-ee.xsd">

	<!-- configure here resource to be shared within the domain -->
	<http:listener-config name="HTTP_Listener_Configuration"
		host="0.0.0.0" port="8081" doc:name="HTTP Listener Configuration" />
</domain:mule-domain>
Note: The reason for moving the configuration to domain project is to re-use the configuration in multiple projects. For example, if there are five financial projects deployed in one server and they all are related and needs to share the same host and port with some common resources, then the ideal situation is to move the shared resources to domain project and all the projects now should be configured with the domain project. Otherwise, the projects will not be deployed as there will be host and port collisions with other applications.
Now go back to your munittest project and double click on the file “mule-project.xml” and set the domain as “testdomain” as below:

After this you should see the app configured with the domain project as below:

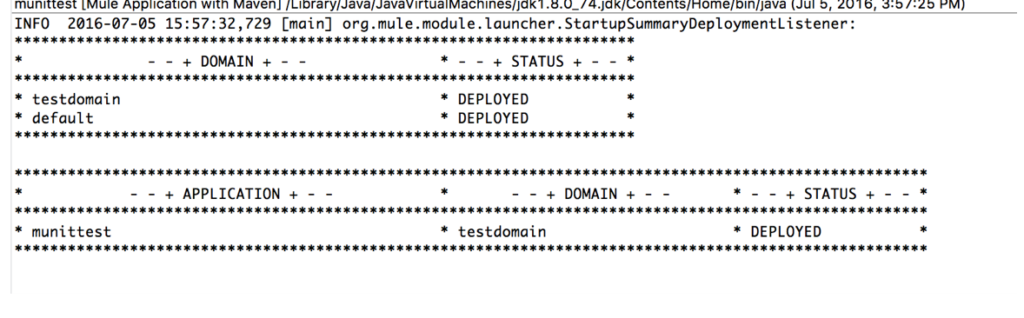
Now run your project again to check if the app is compiled and deployed properly. If you see any errors, close and open the munittest project again.
Check the output in the console and it should show both the domain and the munittest app is deployed as below:
 Creation of Munit tests:
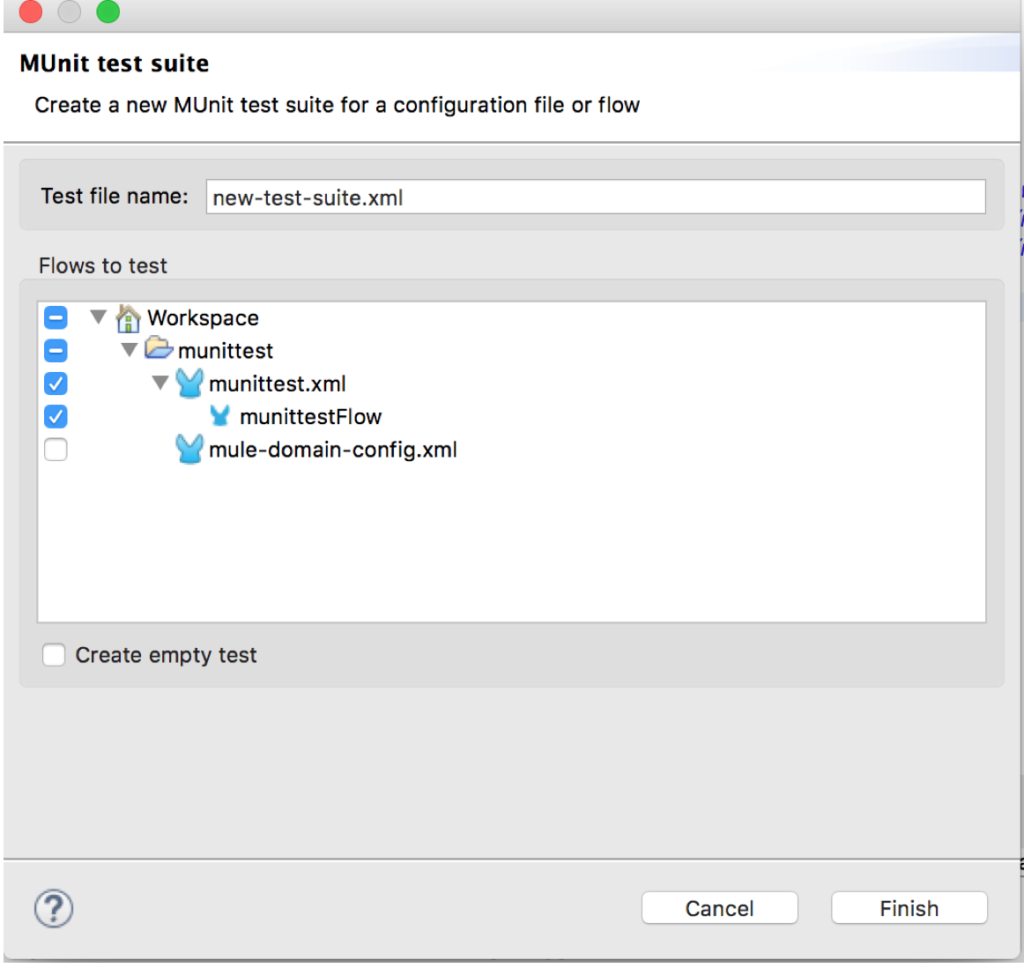
Munit test studio plugin is available with the Anypoint studio and you need not download explicitly. To create tests, Click File ->MUnit and select the flow you want to test. In our case, we will be testing the “munittestflow” and so I have selected that.
Click “Finish” button.
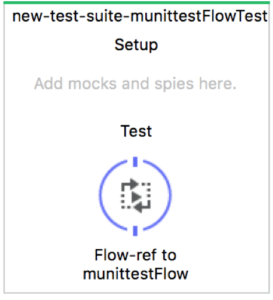
At first instance, you will see a Test created with a flow reference to the “munittestflow” as below:
Now click on the pom.xml file and check the xml source.
You will see that Studio has added the plugin for MUnit and it has “runCoverage” set as true. This means when you run the MUnit test suite, it calculates the coverage for that flow.
<plugin>
                <groupId>com.mulesoft.munit.tools</groupId>
                <artifactId>munit-maven-plugin</artifactId>
                <version>${munit.version}</version>
                <executions>
                    <execution>
                        <id>test</id>
                        <phase>test</phase>
                        <goals>
                            <goal>test</goal>
                        </goals>
                    </execution>
                </executions>
                <configuration>
                    <coverage>
                        <runCoverage>true</runCoverage>
                        <formats>
                            <format>html</format>
                        </formats>
                    </coverage>
                </configuration>
            </plugin>
Also you will observe that Studio has added two dependencies in the POM file. These are useful to run the MUnit tests.
<dependency>
            <groupId>com.mulesoft.munit</groupId>
            <artifactId>mule-munit-support</artifactId>
            <version>${mule.munit.support.version}</version>
            <scope>test</scope>
        </dependency>
    <dependency>
            <groupId>com.mulesoft.munit</groupId>
            <artifactId>munit-runner</artifactId>
            <version>${munit.version}</version>
            <scope>test</scope>
        </dependency>
Finally, you will observe that it has added a dependency for mule domain project. If this dependency is not added, you will get errors while running the test suites. Because the listener configuration is defined in the domain project and your test Suite will try to run the coverage even though when you change the setting <runCoverage> in the POM to false. Because the test suite will not obey this setting while running your tests. So make sure that you have added dependency for the domain project.
<dependency>
            <groupId>com.mycompany</groupId>
            <artifactId>testdomain</artifactId>
            <version>1.0.0-SNAPSHOT</version>
            <scope>test</scope>
            <type>zip</type>
        </dependency>
Luckily this all will be done for you by the studio and you do not have to worry about it.
Run your project once to verify that we did not break anything.
Execute tests from Studio:
Right click on the Message Flow area of the test suite xml created. You will find the xmls in the folder “src/test/munit” in the munittest project. Double click on that file and then right click and click “Run MUnit Suite”. Once it completes running, it will display the results in the Munit window as below:
Now go back to your flow and you should see tick mark for “set payload” indicating that it has executed the flow. Here we are not asserting anything or verifying. Just trying to execute the flow. Clicking on the “Generate Report” button in the “MUnit” window will give us the code coverage report.

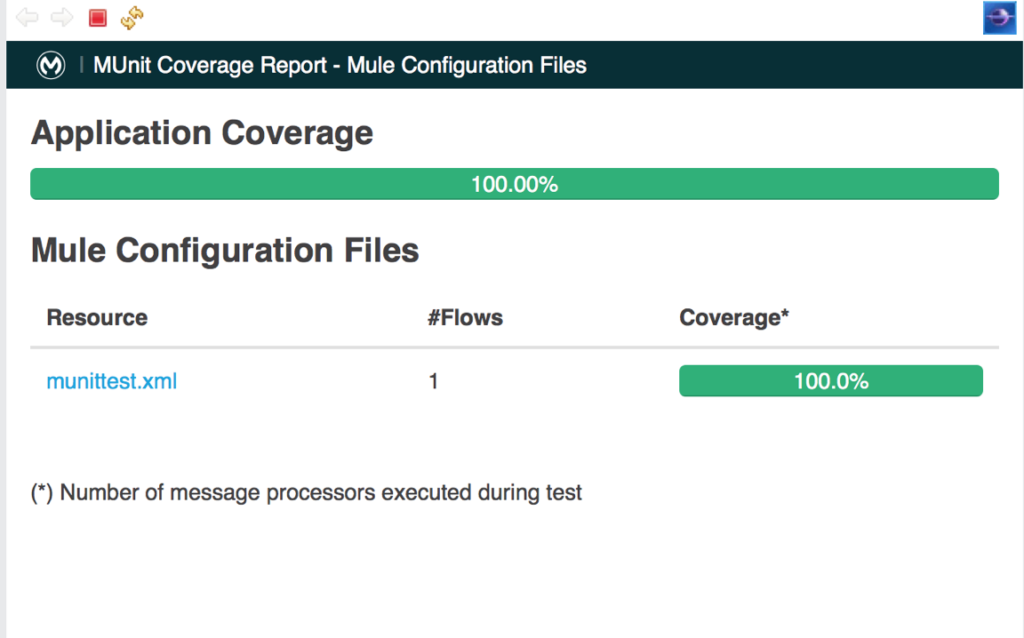
Code coverage report will be displayed as below:
Now let us add logic for asserting and verifying that set payload element is called once.
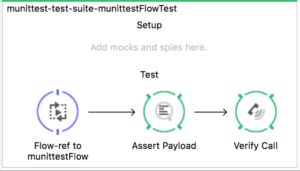
For this drag and drop “Assert Payload” and “Verify Call” elements on to the Test and set the properties of the two elements.
Set the properties for “Assert Payload” as below:
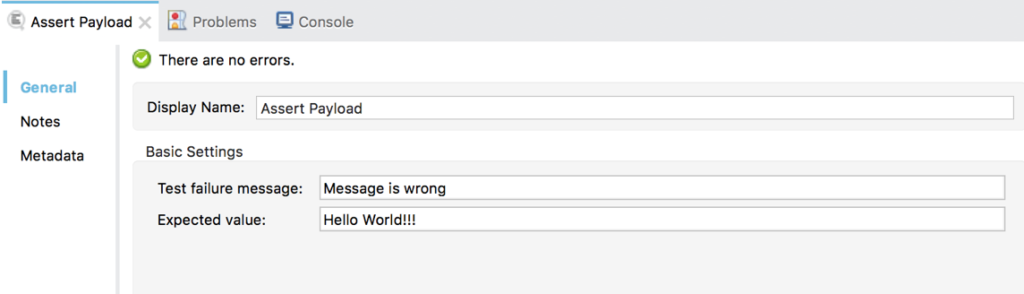
If the expected value and the actual value are different, then it should show the test failure message with text “Message is wrong”.
Set the “Verify Call” as below:
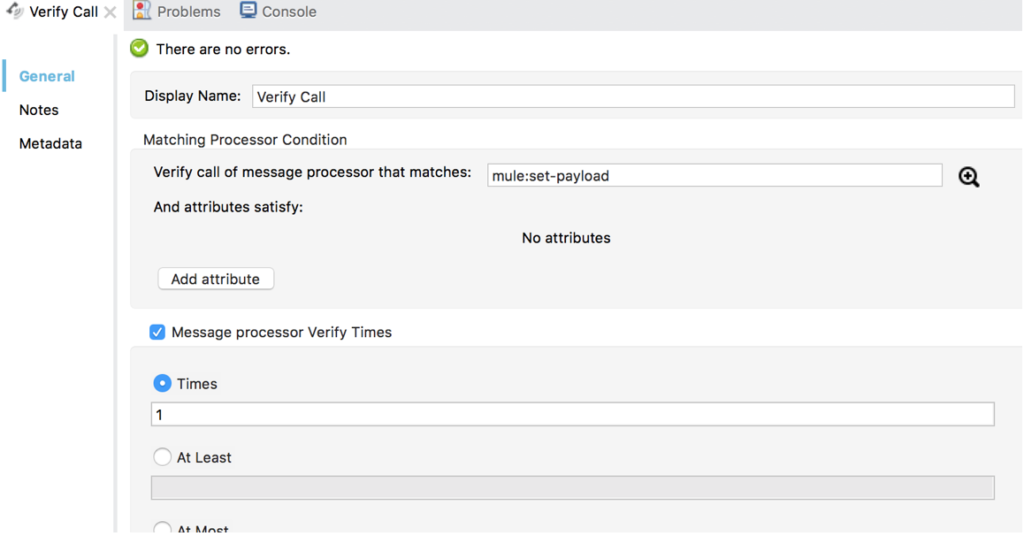
Here we are specifying to check if “set-payload” is called 1 time. In the properties, it first checks for message processors that matches “set-payload” and then will verify how many times the processor has been called while executing the tests.
Now run your test and you should see the test should pass. If you want to test the failure, change the “Assert Payload” expected value to some other and you can verify the test failure message.
Sometimes, while performing functional tests, we do not want to connect to some components like database or queues and so we need to mock them. Whenever any call is made to those elements, we specify use the mock elements instead of actual. This will help us to verify only the functionality without actually connecting to the actual dependencies.
You can add mocks on the top section under “Setup” in the Test elements. In our case, let’s mock the set-payload. So whenever the actual reference is made to actual element it should use our mock element and return the value that is set in mock instead of actual.
![]()
Here we are specifying in the “Matching Processor Condition” that when message processor matches set-payload and check its attribute “doc:name” has a value “Set Payload”. If YES, then return a message with payload “Another World” instead of “Hello World!!!”.
Now you need to change the “Assert Payload” expected value to “Another World” to check if the mock element has been called upon instead of the actual “set-payload”. Now run the test again and you should see test must be passing. If you see any errors, then it must be because of the expected value not changed.
Executing the tests from Maven Command Line:
Go to the location of the project’s root folder from the command prompt and run the command “mvn clean test”. This will run all the tests in the project. If you want to run a specific test, refer to Mulesoft website for other options.
You can get the source code from github:Mule Project Source Code
Edited(07/09/2017):
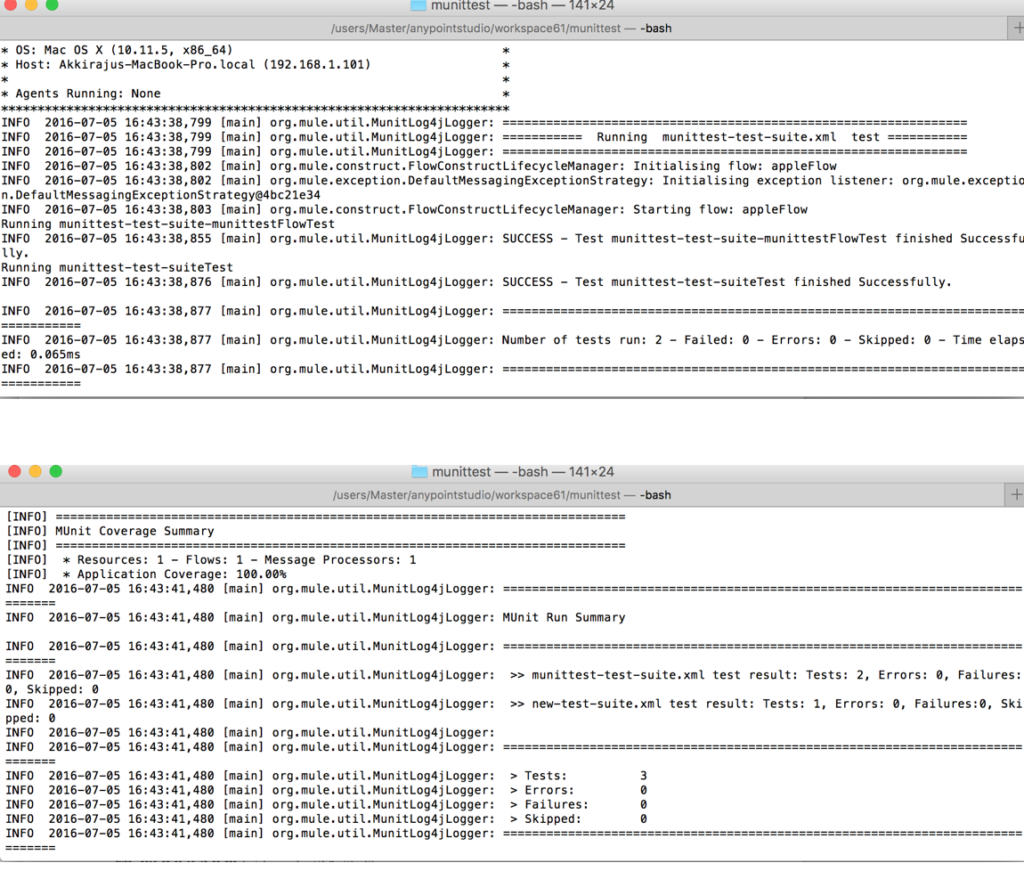
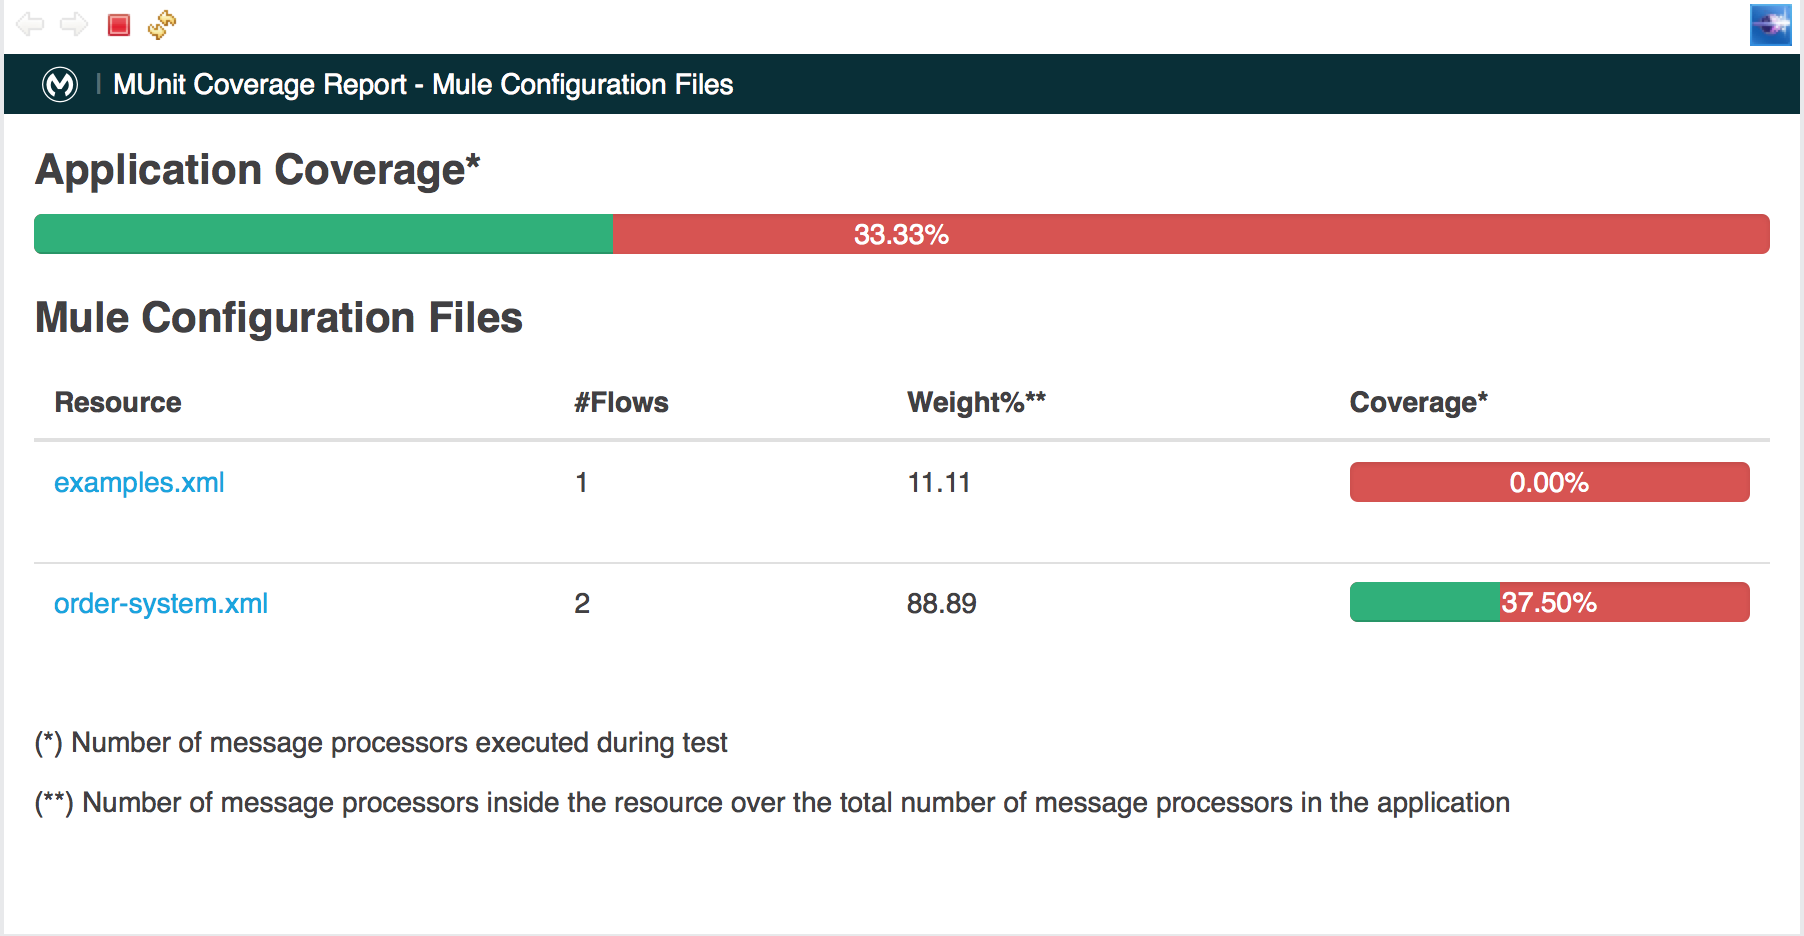
I am attaching screenshots to demonstrate how the code coverage looks like by running some other test that I was working on.
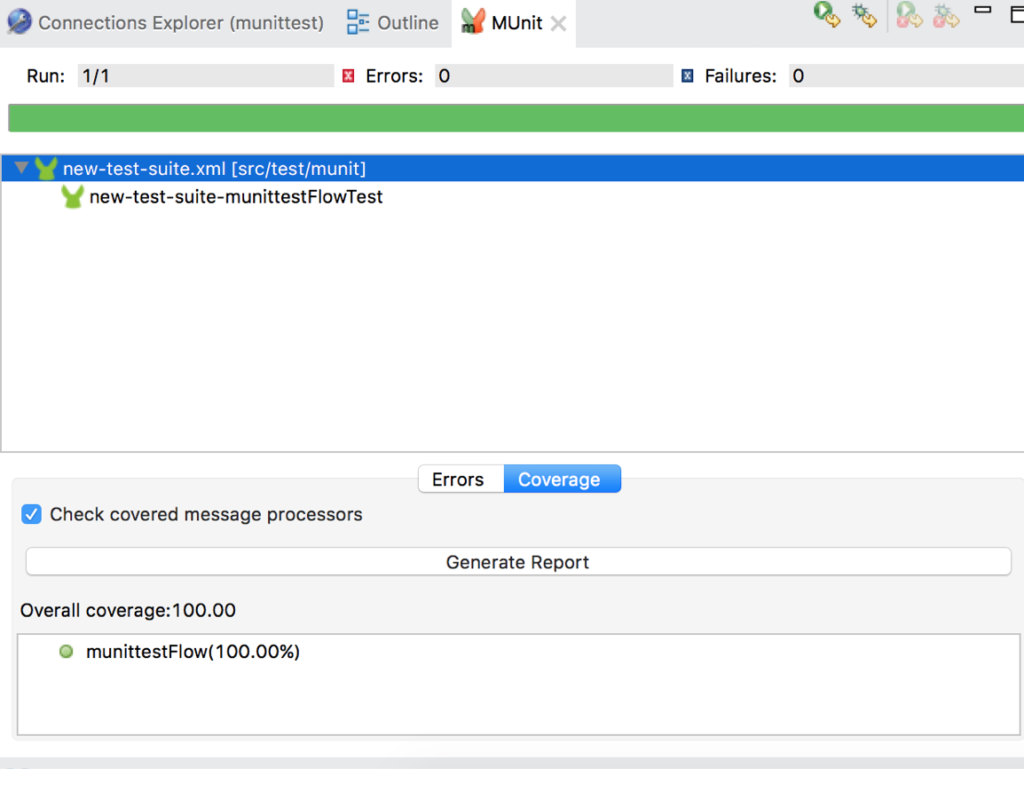
When we run the munit tests, it should display the results as shown in the below screenshot:
Go to tab “Unit” and click the tab “Coverage” and it should display the “Generate Report” button. Note the overall coverage is 33.33%. If your tests cover all the flows, then it should display 100%.
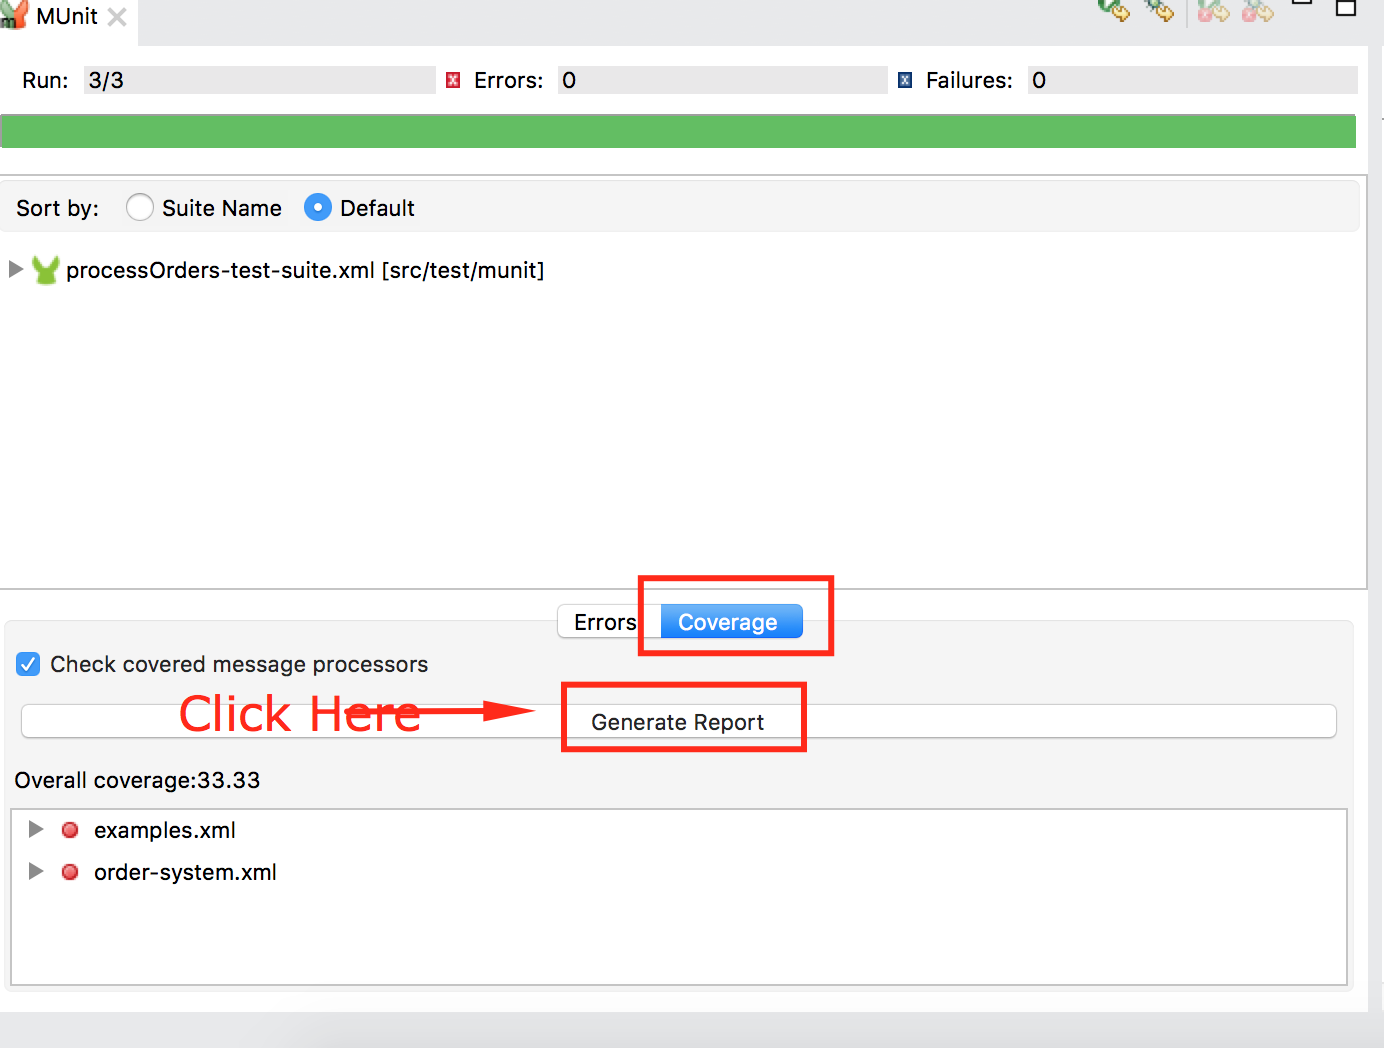
When you click on the “Generate Report” button, you should see another window opened in the Anypoint Studio as below:


Very detailed steps.. Thanks for sharing.
btw, need a subscribe button here 🙂
I am getting the below error when I am trying to execute. please reply urgently.
[ERROR] Failed to execute goal on project munittest: Could not resolve dependencies for project com.mycompany:munittest:mule:1.0.0-SNAPSHOT: Failure to find com.mycompany:testdomain:zip:1.0.0-SNAPSHOT in https://repository.mulesoft.org/nexus-ee/content/repositories/releases-ee/ was cached in the local repository, resolution will not be reattempted until the update interval of MuleRepository has elapsed or updates are forced -> [Help 1]
Hi Prashant, thanks for the question.
Please remove the dependency in the POM file for the testdomain.zip. Go to POM file and search for “testdomain” and you should find a dependency as below:
<dependency>
            <groupId>com.mycompany</groupId>
            <artifactId>testdomain</artifactId>
            <version>1.0.0-SNAPSHOT</version>
            <scope>test</scope>
            <type>zip</type>
        </dependency>
Remove the above dependency or comment it. Also remove the following dependency in the POM file. It seems the artifact does not exist now:
 <dependency>
            <groupId>com.mulesoft.muleesb.modules</groupId>
            <artifactId>mule-module-anypoint-mq-ee</artifactId>
            <version>1.0.1</version>
        </dependency>
Let me know if you still face any challenge. I will check-in the code with the changes in GitHub too.
Hi thank you for the detail instruction, I click on the generate report but there is no pop up or any windows to show me the HTML coverage report. is there any otherthings I should set up or any other windows I need to open to have the HTML coverage report show ?
Hi Kian, thanks for visiting the blog. Please search “Edited(07/09/2017):” at the end of the blog, for understanding on how to view the coverage report in Anypoint studio. Let me know if you still have questions.