
In my previous article, I have discussed about ObjectStore and operations on ObjectStore using Object Store Connector with a simple Mule application. Also, tested the flows to check the operations: Store, Remove, Retrieve and Retrieve all keys.
Requirements for this article:
- Anypoint Studio 6.2.5
- Anypoint Platform Trial account or Organization account
In this article, we would be discussing the most important use case of ObjectStore i.e. maintaining the state of application in the CloudHub using Application Data.
I will be using the project that I have built in my previous article and the code can be downloaded from GitHub using https://github.com/ivaturia/testobjectstore/
Open the project in Anypoint Studio and right-click on the project and select “Anypoint Platform” and then select “Deploy to Cloud”. It might open a popup to enter the credentials for Anypoint Platform and then it will take you to the deployment screen as shown in the figure 2.
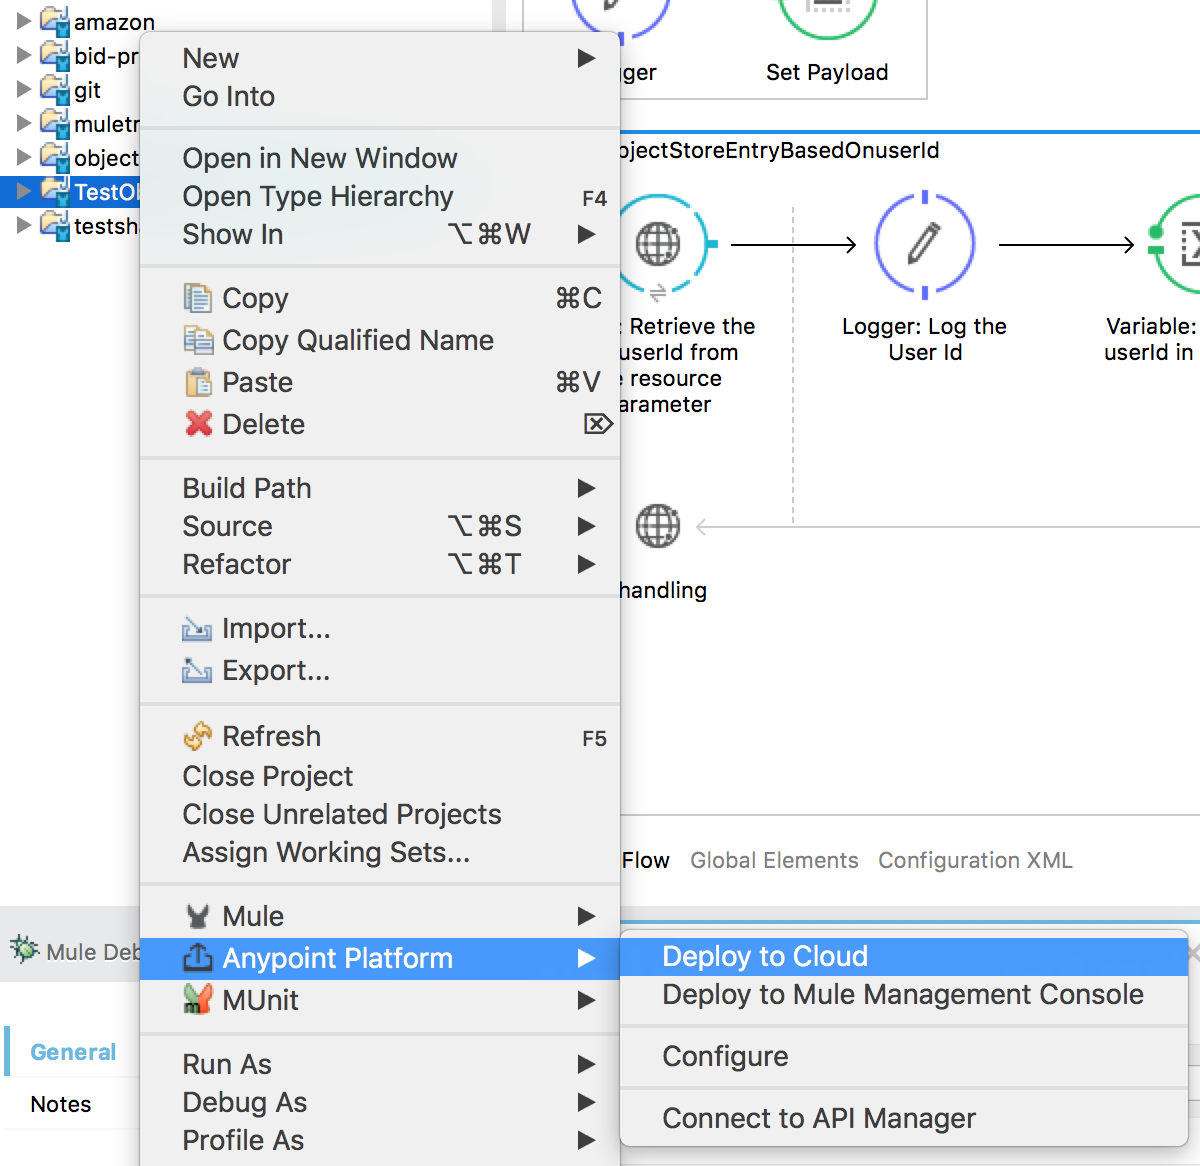
Figure 1 – Deploy to Cloud
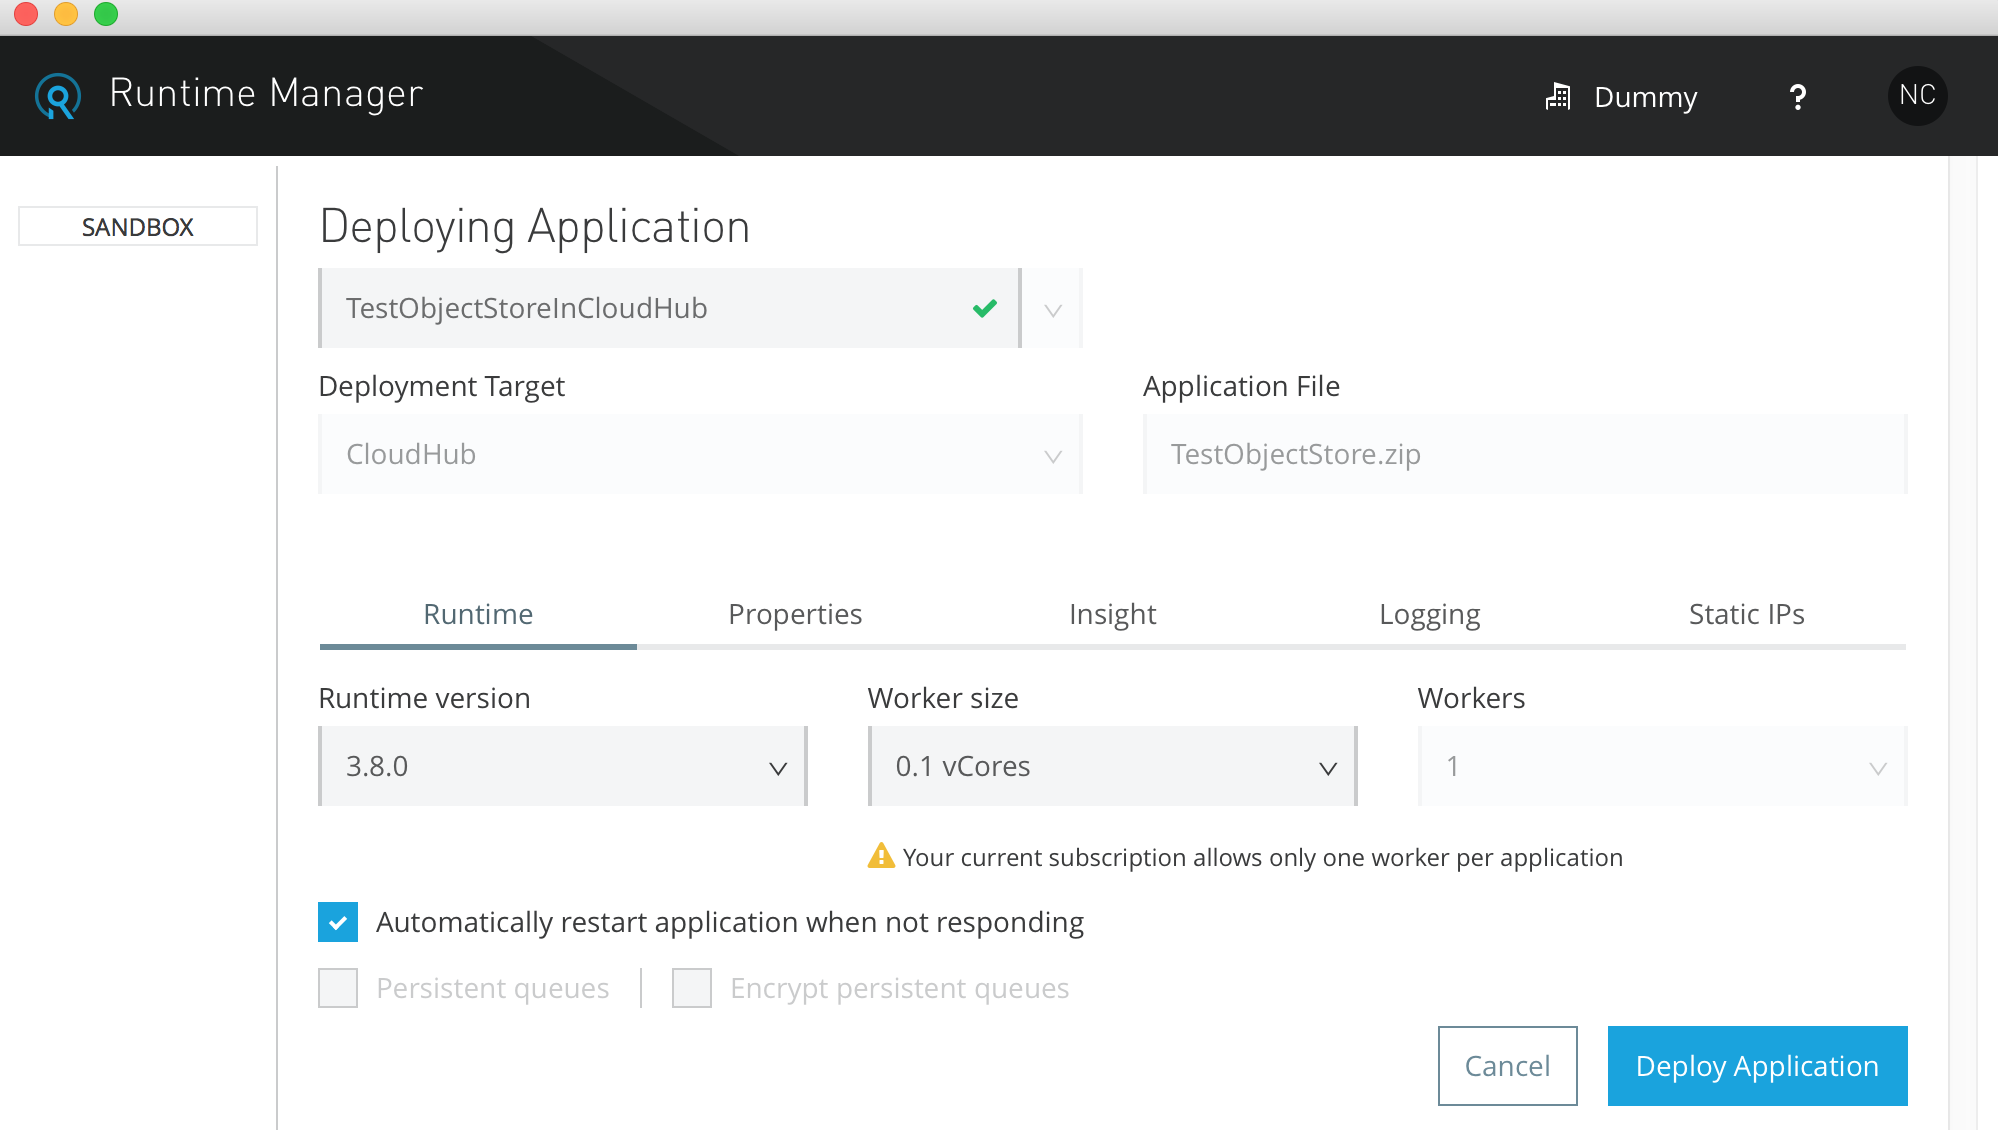
Figure 2 – Deploying Application
Select the Worker size and number of Workers if your account permits. I am using trial account and so I am left with limited options. After selecting the appropriate settings, then click on the “Deploy Application” button. Your deployment will start now.
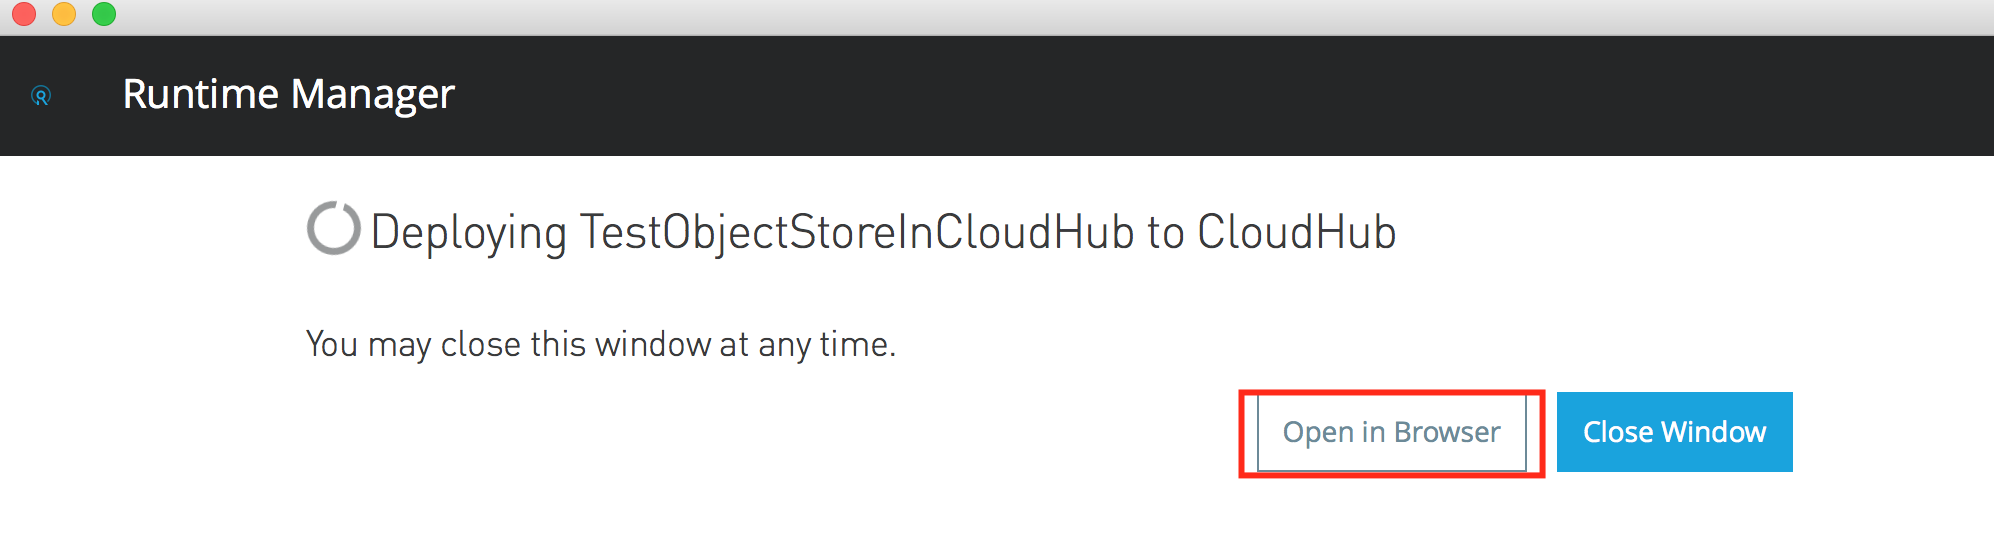
Figure 3 – Deploying window
Click on the “Open in Browser” button so that you can navigate to different sections in the Runtime Manager with ease and click the button “Close Window”. Now go to browser and “Runtime Manager”. In the Runtime Manger page, click “Applications” and your new application will be displayed along with the deployment status. Wait till the status column shows “Started” as shown in the figure 4.

Figure 4 – Runtime Manager – Applications
Now click on the application name in the list of applications. In my case, it is “testobjectstoreincloudhub” and you will be navigated to dashboard page. There are two things to be noted in this page. One is the domain name highlighted in the page and other one is the “Application Data” section in displayed on the left.
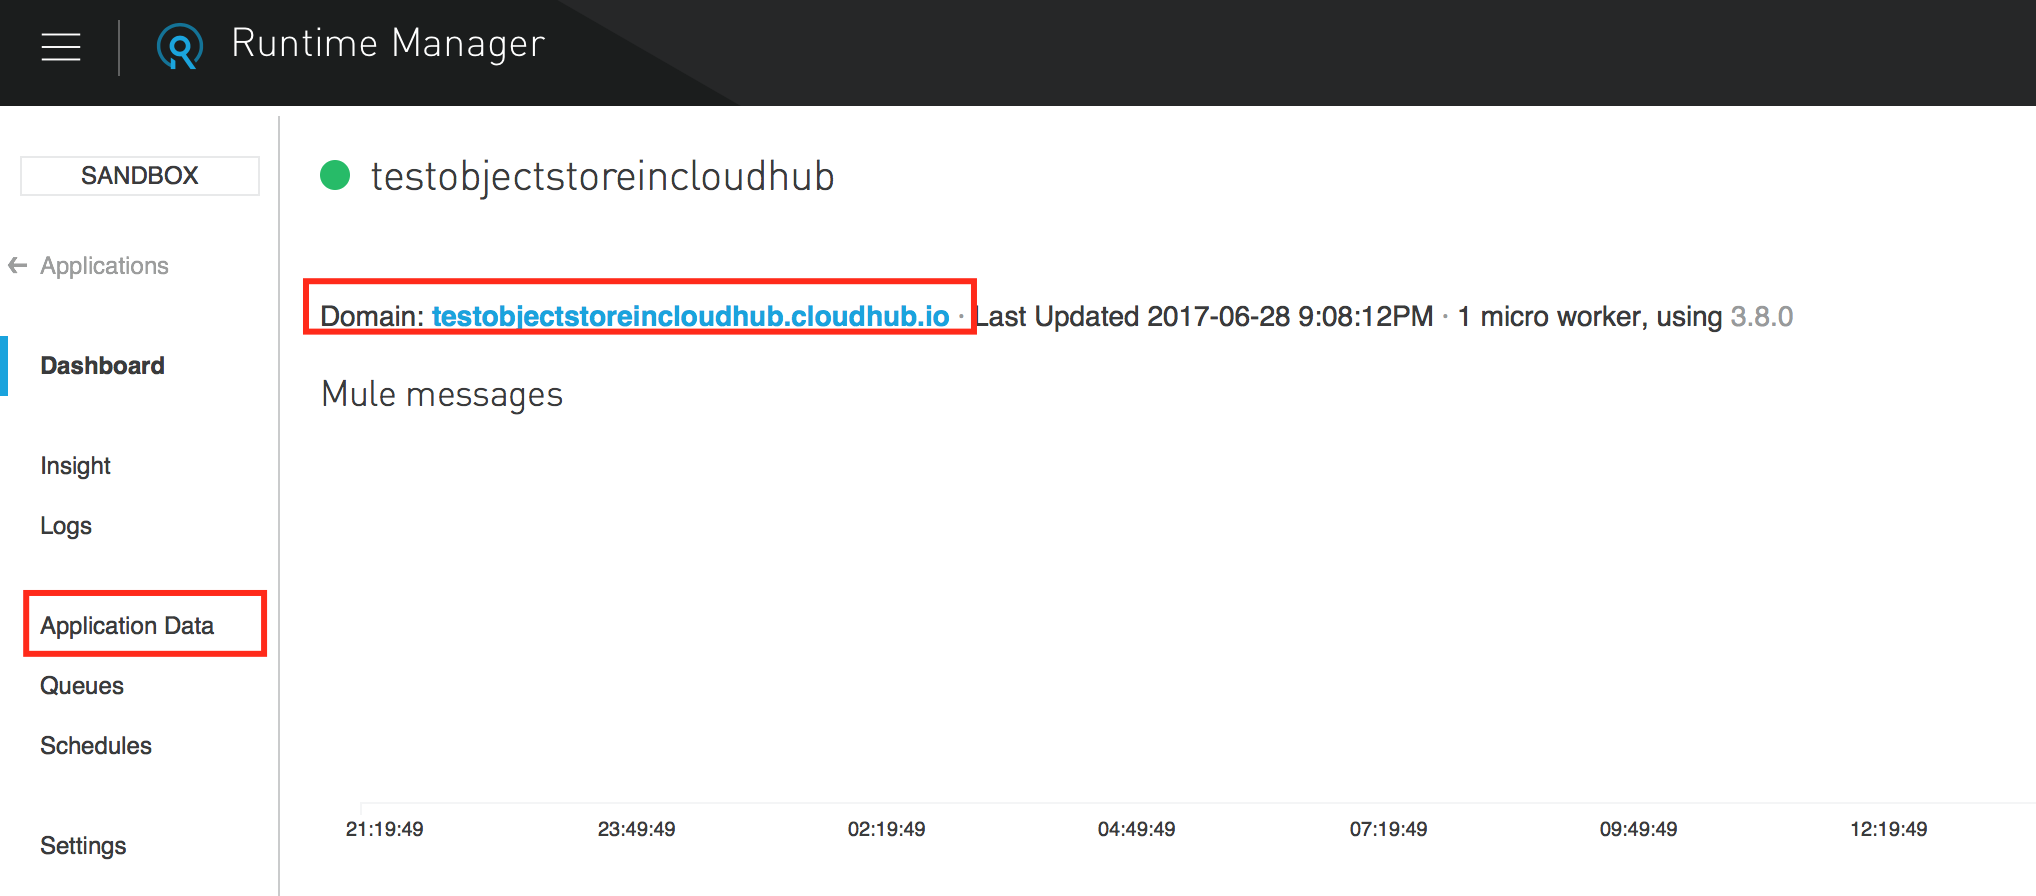
Figure 5 – Dashboard
Let us check Application Data section first. Click on the “Application Data” link and we should be seeing blank screen with no key/value pairs as shown in the figure 6.
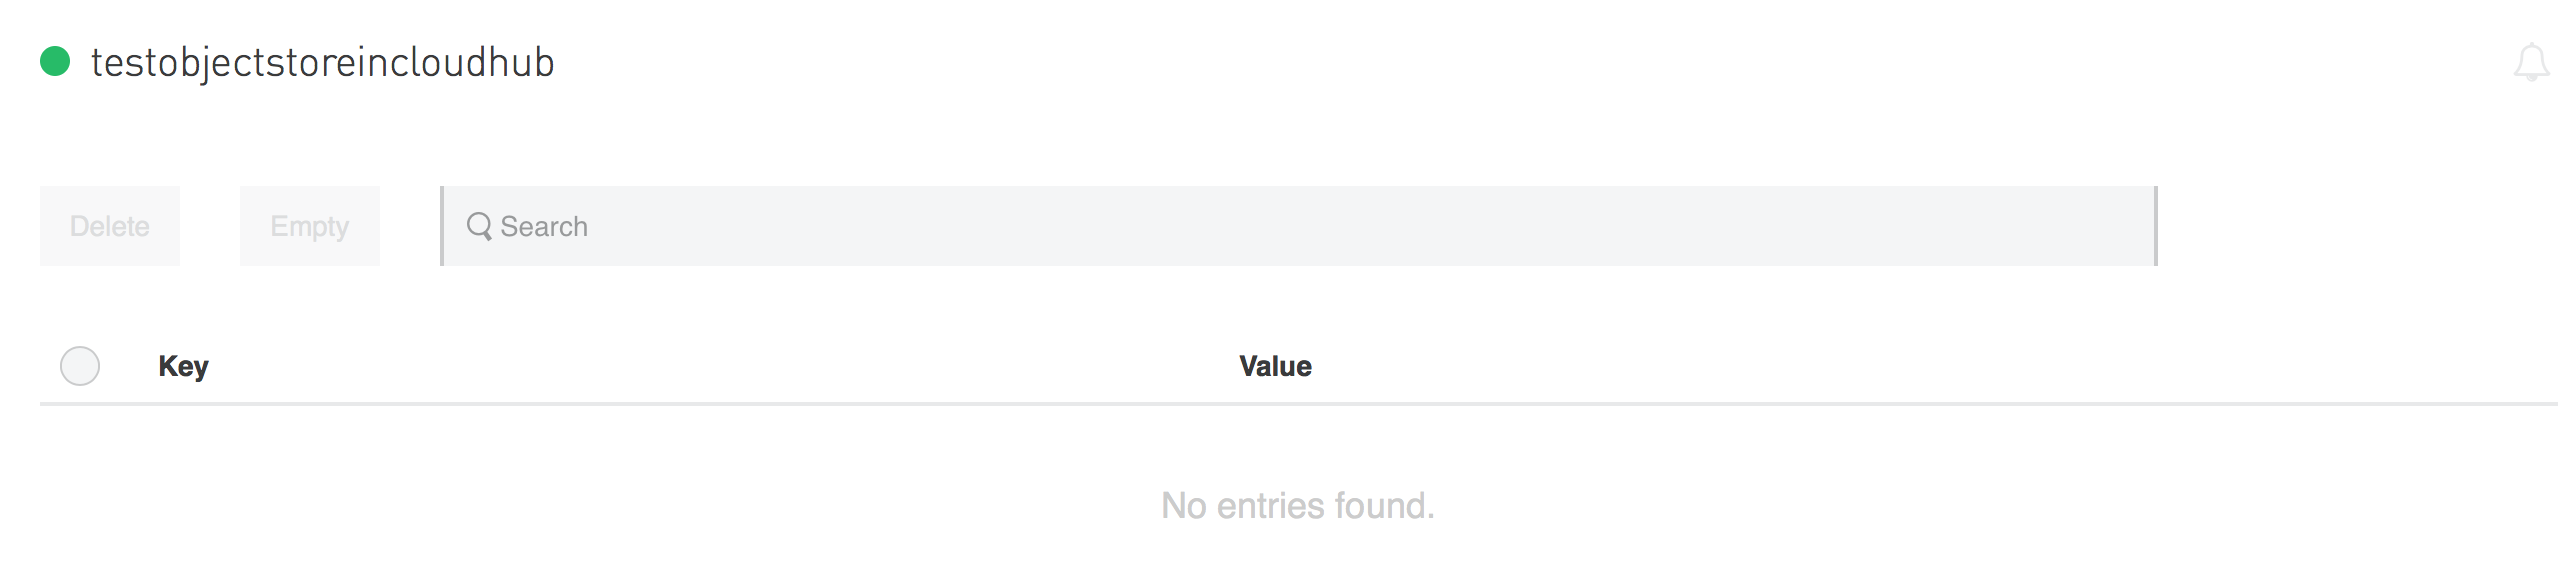 Figure 6 – Application Data page
Now copy the domain (in my case it is testobjectstoreincloudhub.cloudhub.io) and we will send requests using the Postman tool. First request will be to post the user data to the endpoint and the URL would be something like this: http://testobjectstoreincloudhub.cloudhub.io/users. Now once you click the “Send” button, the request is submitted and the response will be 200.
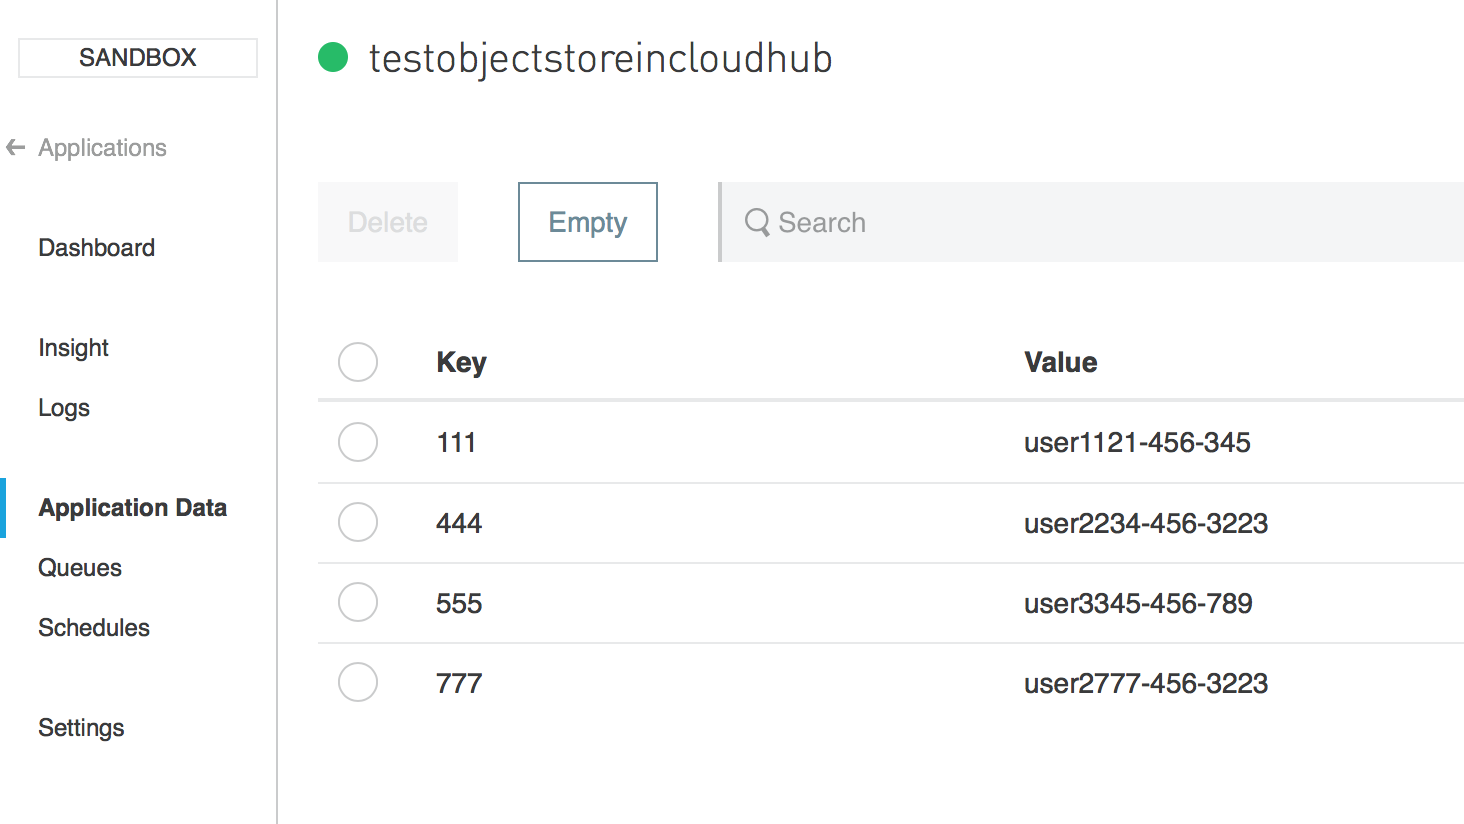 Figure 7 – Post request
Now, we can verify if the key/value pairs are created for the data. Go back to the “Application Data” and check the data on the page. Now you should see all the data in the format key/value pair as shown in the figure 8.

Figure 8 – Application Data page
Now we will test the second request i.e. retrieving the value using key as the user Id. Hit the GET request with the URL http://testobjectstoreincloudhub.cloudhub.io/111 for the user Id 111 and you should get back the value corresponding to the key 111.
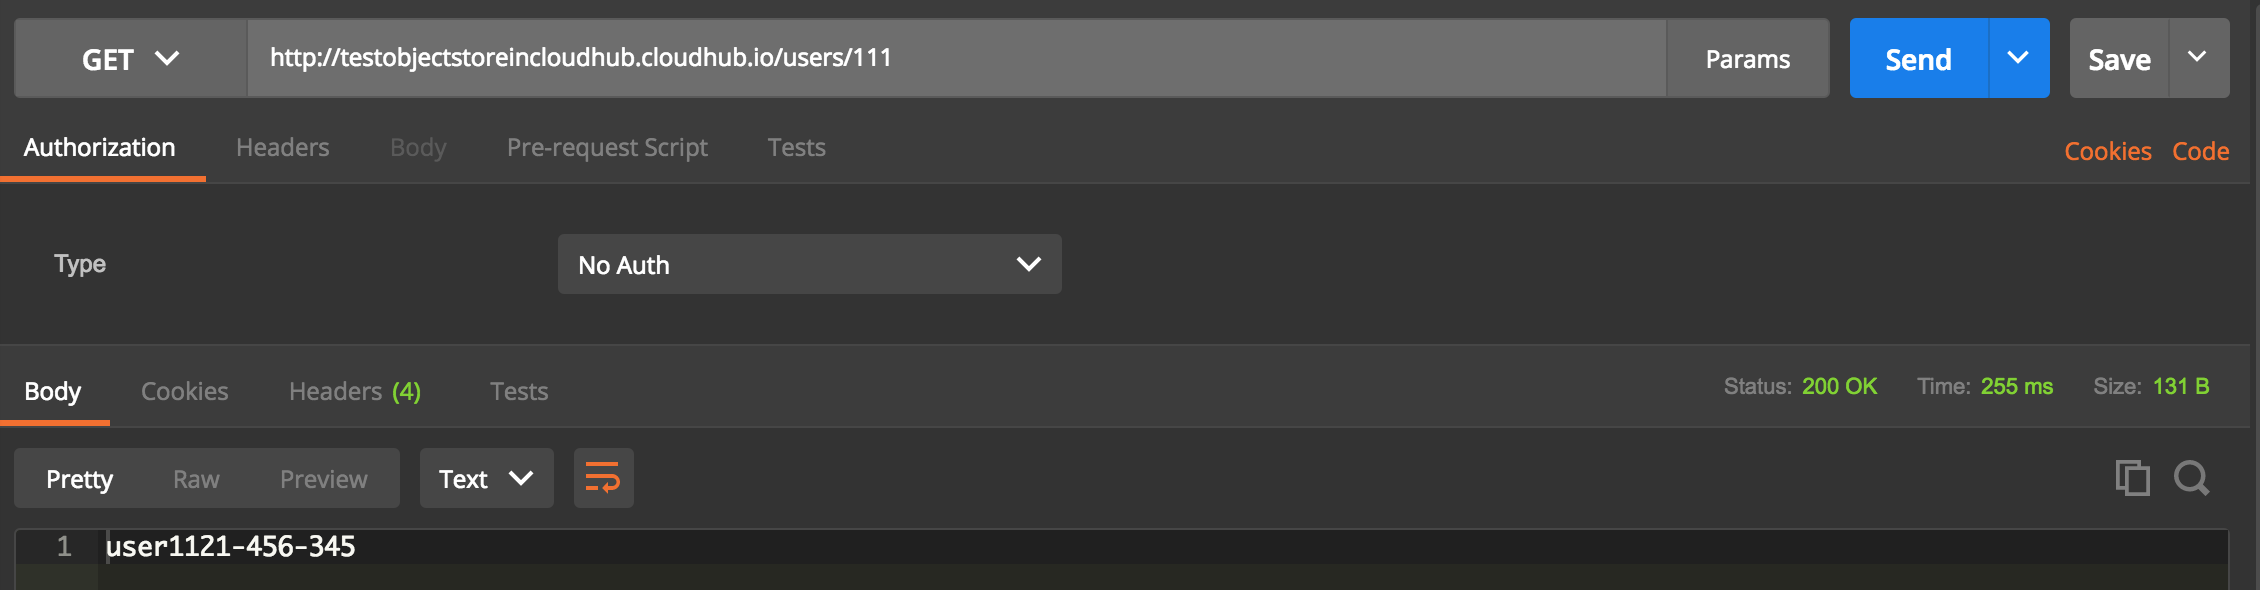 Figure 9 – Retrieve operation
Now, we will execute the third request i.e. delete a record using the key value. I am going to delete the record with the key 111 by the GET request http://testobjectstoreincloudhub.cloudhub.io/users/delete/111. This request will delete the record and also lists the remaining keys in the response as below:
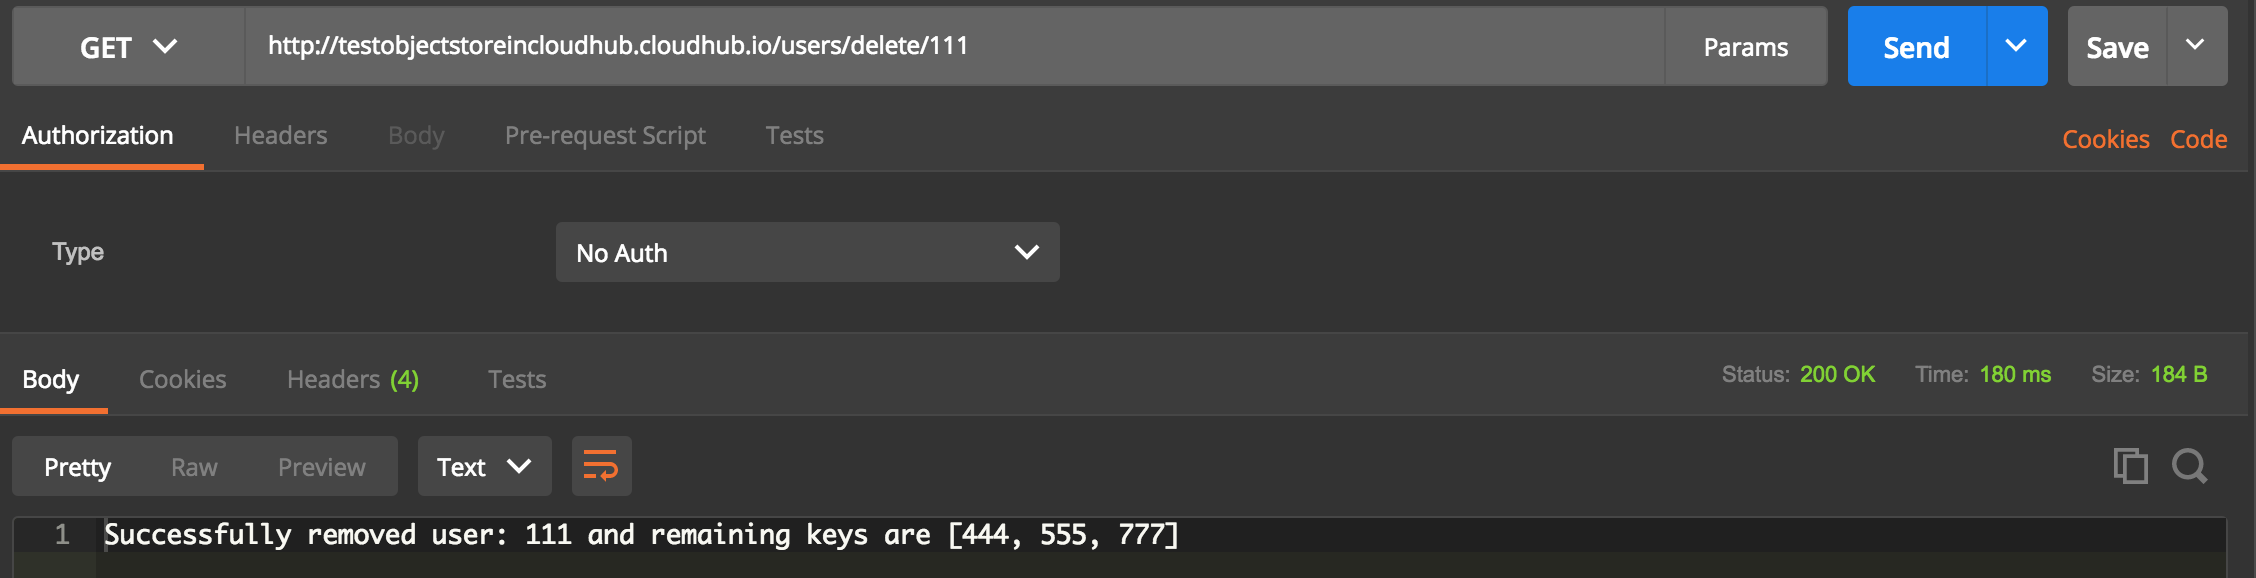 Figure 10 – Delete operation
We can physically check if the record is deleted by going through the “Application Data” in the CloudHub. You will find the key with 111 will disappear and only data with keys 444, 555 and 777 will be displayed as shown in the figure 11.
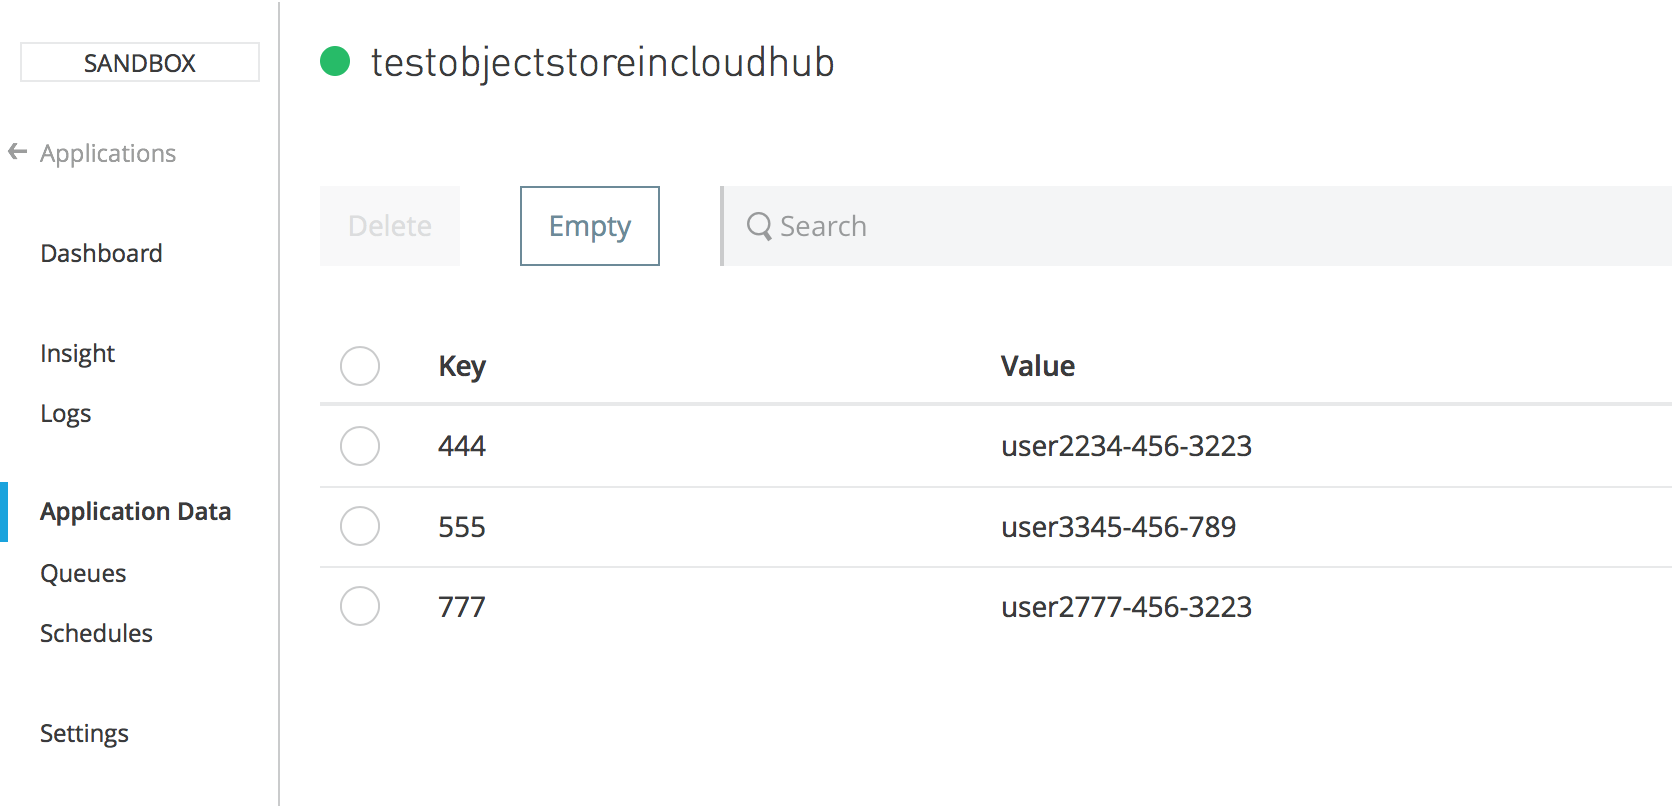 Figure 11 – Application Data page
This is a great feature for maintaining the application state in the CloudHub for an application.
Important points about Object Store from the MuleSoft’s website https://docs.mulesoft.com/runtime-manager/managing-application-data-with-object-stores

Figure 12 – Important information from MuleSoft’s website