
In my previous article we have discussed on how to install MongoDB in Windows and OSX. Now let us explore how to work with MongoDB Shell interface or command window or terminal window.
Just to recap, in order to work with MongoDB you need to first open a terminal or command window and type “mongod” and press enter:
$ mongod
And you should see something like below if you are using terminal window like me in Mac OSX:
2017-12-25T11:21:04.409-0600 I CONTROL [initandlisten] ** WARNING: soft rlimits too low. Number of files is 256, should be at least 1000
2017-12-25T11:21:04.431-0600 I FTDC [initandlisten] Initializing full-time diagnostic data capture with directory ‘/data/db/diagnostic.data’
2017-12-25T11:21:04.432-0600 I NETWORK [initandlisten] waiting for connections on port 27017
Out of all the messages displayed in the command window or terminal, “Waiting for connections on port 27017” is what we should be interested in to know if the MongoDB has started correctly.
Since MongoDB server is up and running, now open another window and type “mongo” and press enter button:
$ mongo
And you should land up a Mongo Shell prompt.
Now with these two windows open and running correctly, its time to play with the MongoDB features.
Now in the mongo shell, type the below:
> use mymongotests
switched to db mymongotests
This is syntactically same as specifying what database to use in the SQL Server Management Studio (SSMS) query window. Though we did not create a database specifying use <databasename> tells Mongo that we are interested in working with the database by name “mymongotests“.
When we run the command >show dbs it won’t list the new database. That is still it did not create it. Mongo creates the DB only when you add collections to it.
To verify above, lets create a collection and see if it lists the new database. To create a new collection, type below:
> db.accounts.insert({“name”:”Saving”,”number”:”123456″,”branch”:”NYC”})
WriteResult({ “nInserted” : 1 })
The syntax is db.<your collection name>.insert(<your data in JSON format>) and you should get a response highlighted in orange color with “nInserted”:1. This informs that one document is inserted.
Now check if DB is created by typing the command >show dbs and now it shows the database listed out.
Now if you want to check if the collection has data that we have inserted above, type the below command:
> db.accounts.find()
{ “_id” : ObjectId(“5a4136529ae85e4e0d78d499”), “name” : “Saving”, “number” : “123456”, “branch” : “NYC” }
Each document will have _id created by MongoDB and it is ObjectId(“<id>”) and other columns with data. This confirms that the data is successfully created and stored in the collection. If you want to specify your own _id, you need to specify the value for _id field while inserting the JSON element in the database. Otherwise, the DB would assign one and creates the document.
“UPSERT” is another operation that is helpful while updating documents. It is like Capture Data Change feature in SQL Server. It checks if the document already exists or not before updating. If document is already present then it will update otherwise, it will insert a new document. This is the safest operation if you are not using INSERT.
Now let us update the document with “name” from “Savings” to “Private” as below:
> db.accounts.update({“_id”:ObjectId(“5a415aea9ae85e4e0d78d49a”)},{“name”:”Private”,”number”:”123456″,”branch”:”NYC”},{upsert:true})
WriteResult({ “nMatched” : 1, “nUpserted” : 0, “nModified” : 1 })
Now when you run find query > db.accounts.find(), you should see the result with “name” as “Private“. If you note, I have specified all the fields though I wanted to update only the name. Had I specified only the “name” field and did not specify other fields, it would have updated the document with only one field. Here let us try updating one field with “Savings/Private” and it modifies “name” but other fields are gone as below:
> db.accounts.update({“_id”:ObjectId(“5a415aea9ae85e4e0d78d49a”)},{“name”:”Savings/Private”},{upsert:true})
WriteResult({ “nMatched” : 1, “nUpserted” : 0, “nModified” : 1 })
> db.accounts.find()
{ “_id” : ObjectId(“5a415aea9ae85e4e0d78d49a”), “name” : “Savings/Private” }
Other operations useful in Mongo:
find() queries all the document in the collection.
findOne() returns a single document even if the filter matches multiple documents. It will randomly match one single document.
Anytime, if you want to need help on any command type $command-name –help and it will display all the options supported by the command.
To import data from csv file, you can run the import command as below:
mongoimport is the command for importing the data from csv file and the sample file I am using in this example can be downloaded at http://samplecsvs.s3.amazonaws.com/Sacramentorealestatetransactions.csv
Specify database name –db <database-name>. database-name will be created dynamically if it does not exist.
Specify collection –collection <collection-name>
Specify type –type <file type>
If the file has a header, then specify –headerline and the file name as –file
$ mongoimport –db realtestatedb –collection realestates –type csv –headerline –file Sacramentorealestatetransactions.csv
2017-12-25T15:32:43.342-0600 connected to: localhost
2017-12-25T15:32:43.403-0600 imported 985 documents
In order to check the records, type “mongo” and go to mongo shell.
> use realtestatedb
switched to db realtestatedb
> show collections
realestates
Now when we run the query find(), it displays the documents as below:

Figure 1 – find() operator
find() will retrieve all the documents and all the documents retrieved in dirty manner. To display the documents in more readable form, use pretty method. This method displays the results in pretty format.
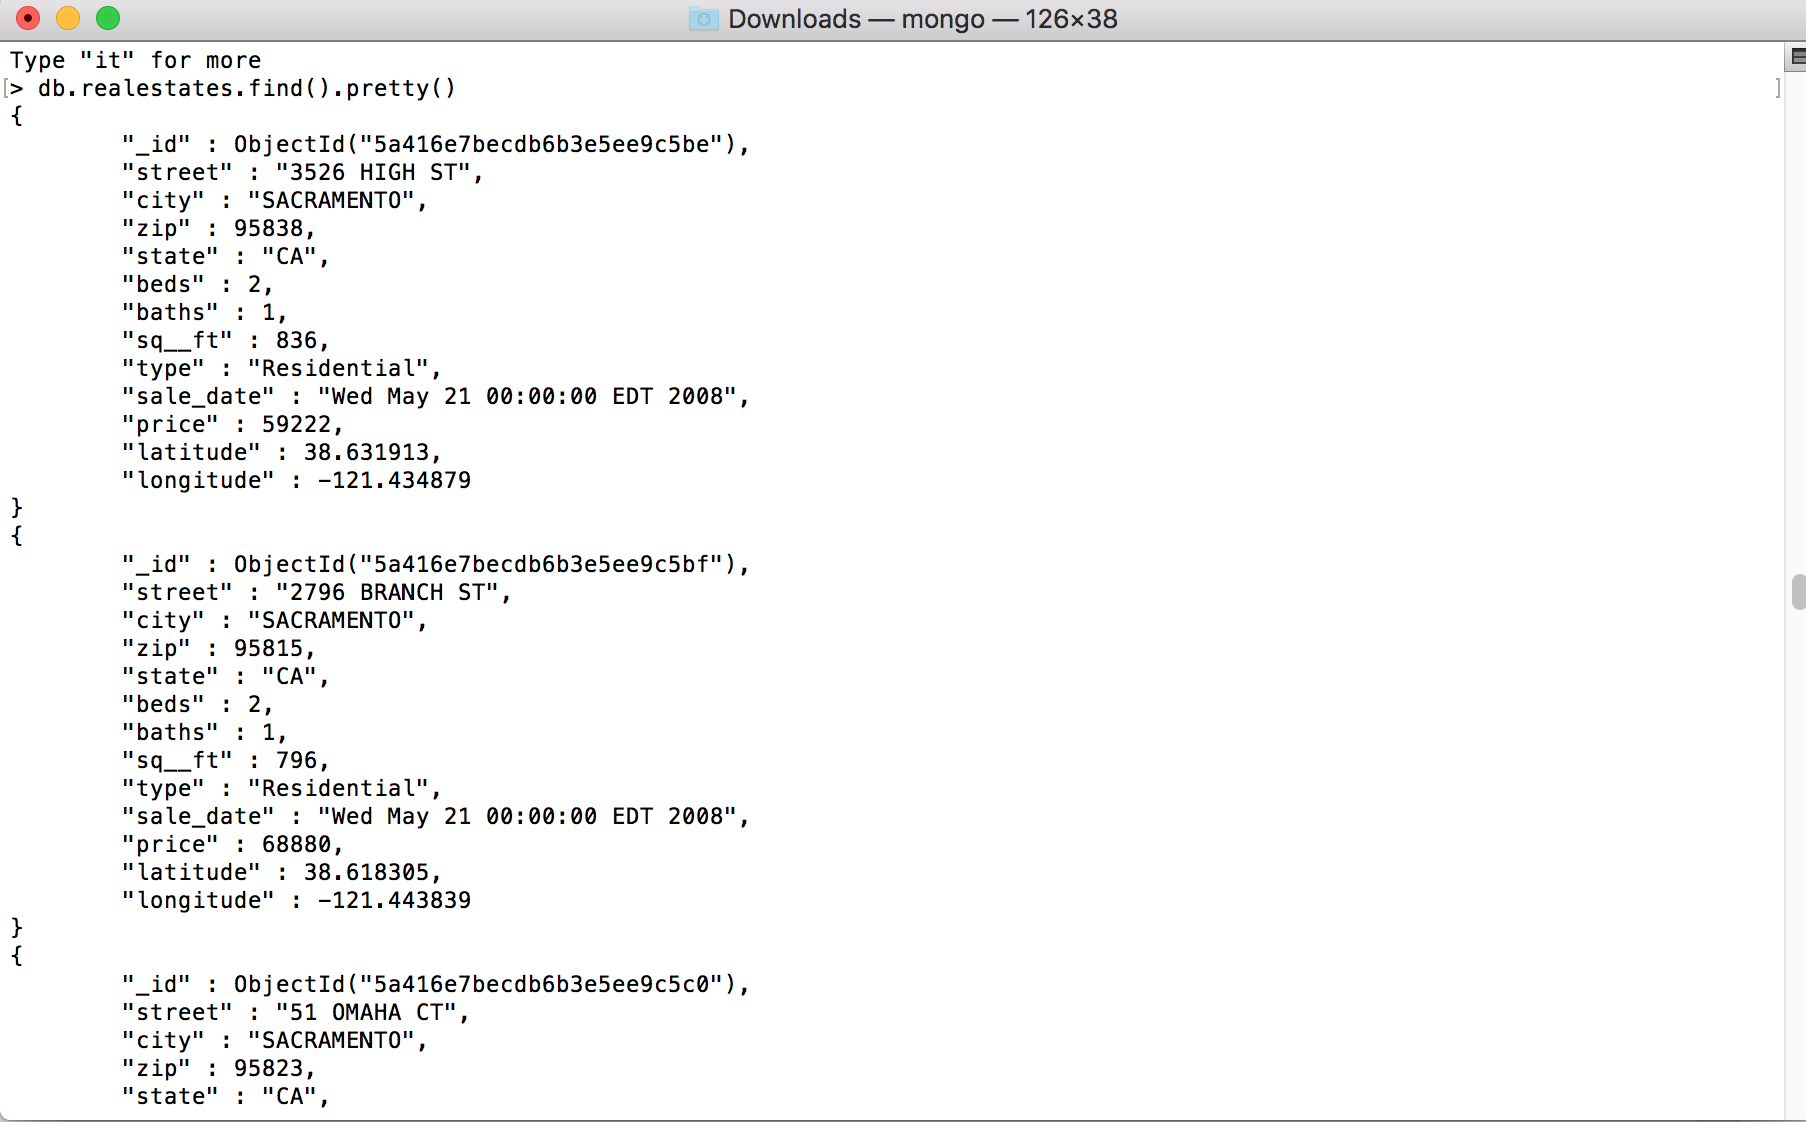
Figure 2 – pretty() method
If you want to query a particular document then you can specify the criteria in the find() method as below:
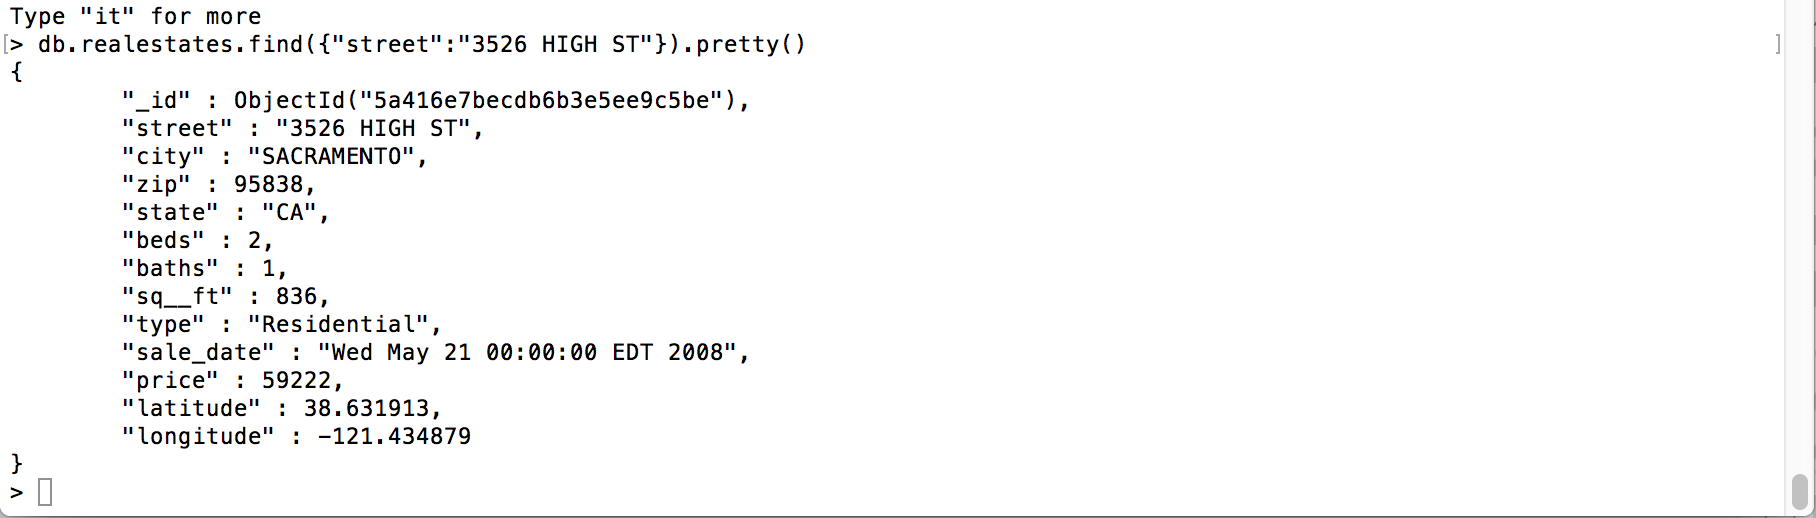
Figure 3 – Query with criteria using find() method
In the above query, we are querying for the document that has “street” value as “3526 HIGH ST” and it returned one document as the result.
Count() – Will return the count of documents in the collection.
> db.realestates.count()
985
> db.realestates.find({“street”:”3526 HIGH ST”}).count()
1
Other set of useful operators in querying are “and“, “or“, “greater than” and “less than“.
You need to specify if you are planning to execute “and” or “or” operation before specifying the criteria. Then you can specify the criteria like “price greater than 500“, “state=CA“. It mostly follows OData syntax for operations like greater = gt, less than or equal to = lte and so on.
For example, if we want to query in the real estates collection the documents that has square feet less than or equal to 500 and greater than 400 and state is CA will be as below:
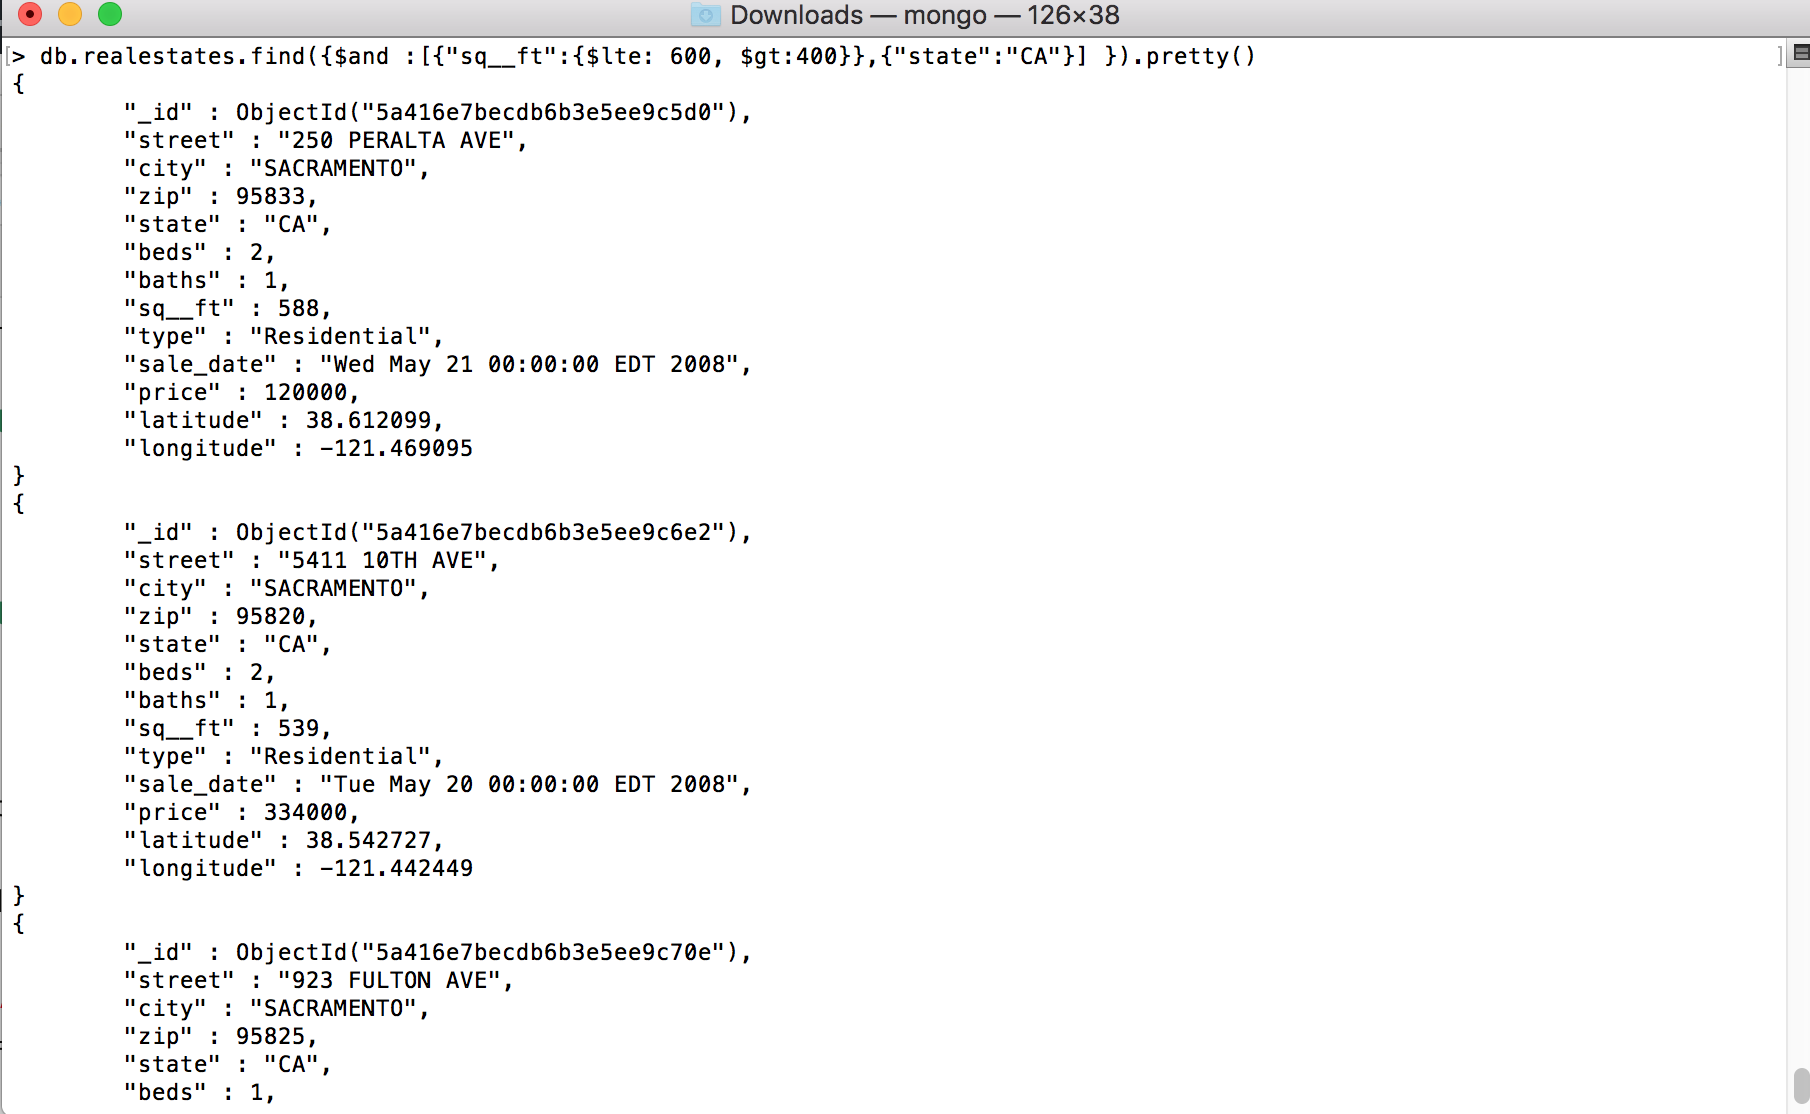
Figure 4 – criteria with and operation
If I add count() method in the above query, it should return the number of documents returned. In our case, it would return 3.
> db.realestates.find({$and :[{“sq__ft”:{$lte: 600, $gt:400}},{“state”:”CA”}] }).pretty().count()
3
When I change the criteria, I get 249 documents back in the results.
> db.realestates.find({$and :[{“sq__ft”:{$lte: 1200, $gt:500}},{“state”:”CA”}] }).count()
249
One more important operation we generally see in our daily programming is the pagination. In pagination, generally what we do is query the records and get limited records per page by specifying limit of records and number of records to skip and provide page numbers on UI. When user clicks next button, we increment the number of records to skip and get the top number of records based on the limit value. In the above query, if I want to display 10 records per page, then I would specify the following criteria:
db.realestates.find({$and :[{“sq__ft”:{$lte: 1200, $gt:500}},{“state”:”CA”}] }).skip(0).limit(10).pretty()
db.realestates.find({$and :[{“sq__ft”:{$lte: 1200, $gt:500}},{“state”:”CA”}] }).skip(10).limit(10).pretty()
Sort() – sorts the documents based on the criteria. In the below example, I am sorting the data based on zip value with -1 indicating descending. If you specify 1, it would take it as ascending.

Figure 5 – sorting
My intention for this article is to get you running with some samples in order to gain confidence but going through MongoDB documents can provide more information about the commands, operations and methods.
Hope you enjoyed this article. Happy coding!!!