
JAX-WS is an abbreviation for Java API for XML Web Services and is a Java Programming API for creating web services (Especially for SOAP services) and is part of Java EE Platform.
JAXB is an abbreviation for Java Architecture for XML Binding. This is used to convert XML to Java object and Java object to XML.
Coming to the agenda of this article, we have the following task:
- Client provides Customer Name as input.
- Web Service built is going to take the input from the client and retrieve the account details like account number, balance and returns along with the customer name in the response. (Note: We are trying to play with a simple service and so values are hard-coded for the account details).
- Using JAXB we are going to change the default order of the properties in the response.
For this article I am using NetBeans IDE and you can download it free from https://netbeans.org/downloads/
Open NetBeans IDE and you should either use Menu bar on the top or projects section to create a new project.
If you are using Menu bar, then click “File” and select “New Project” as shown below:
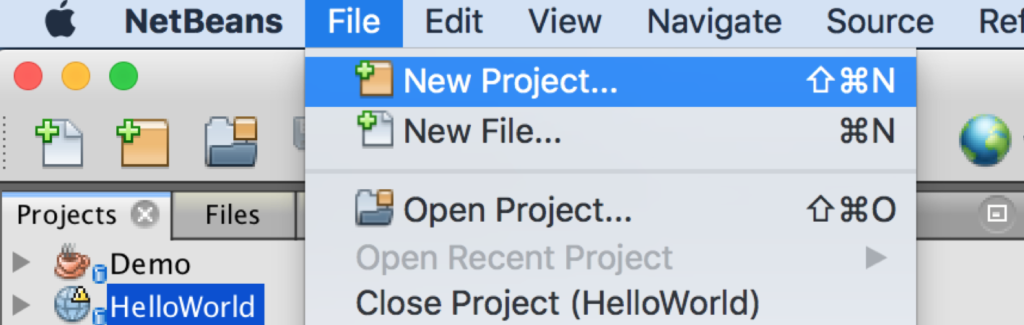
Figure 1 – Creating new project
Then select “Java Web” in the Categories list and select “Web Application” in the Projects list and click button “Next” as shown below:
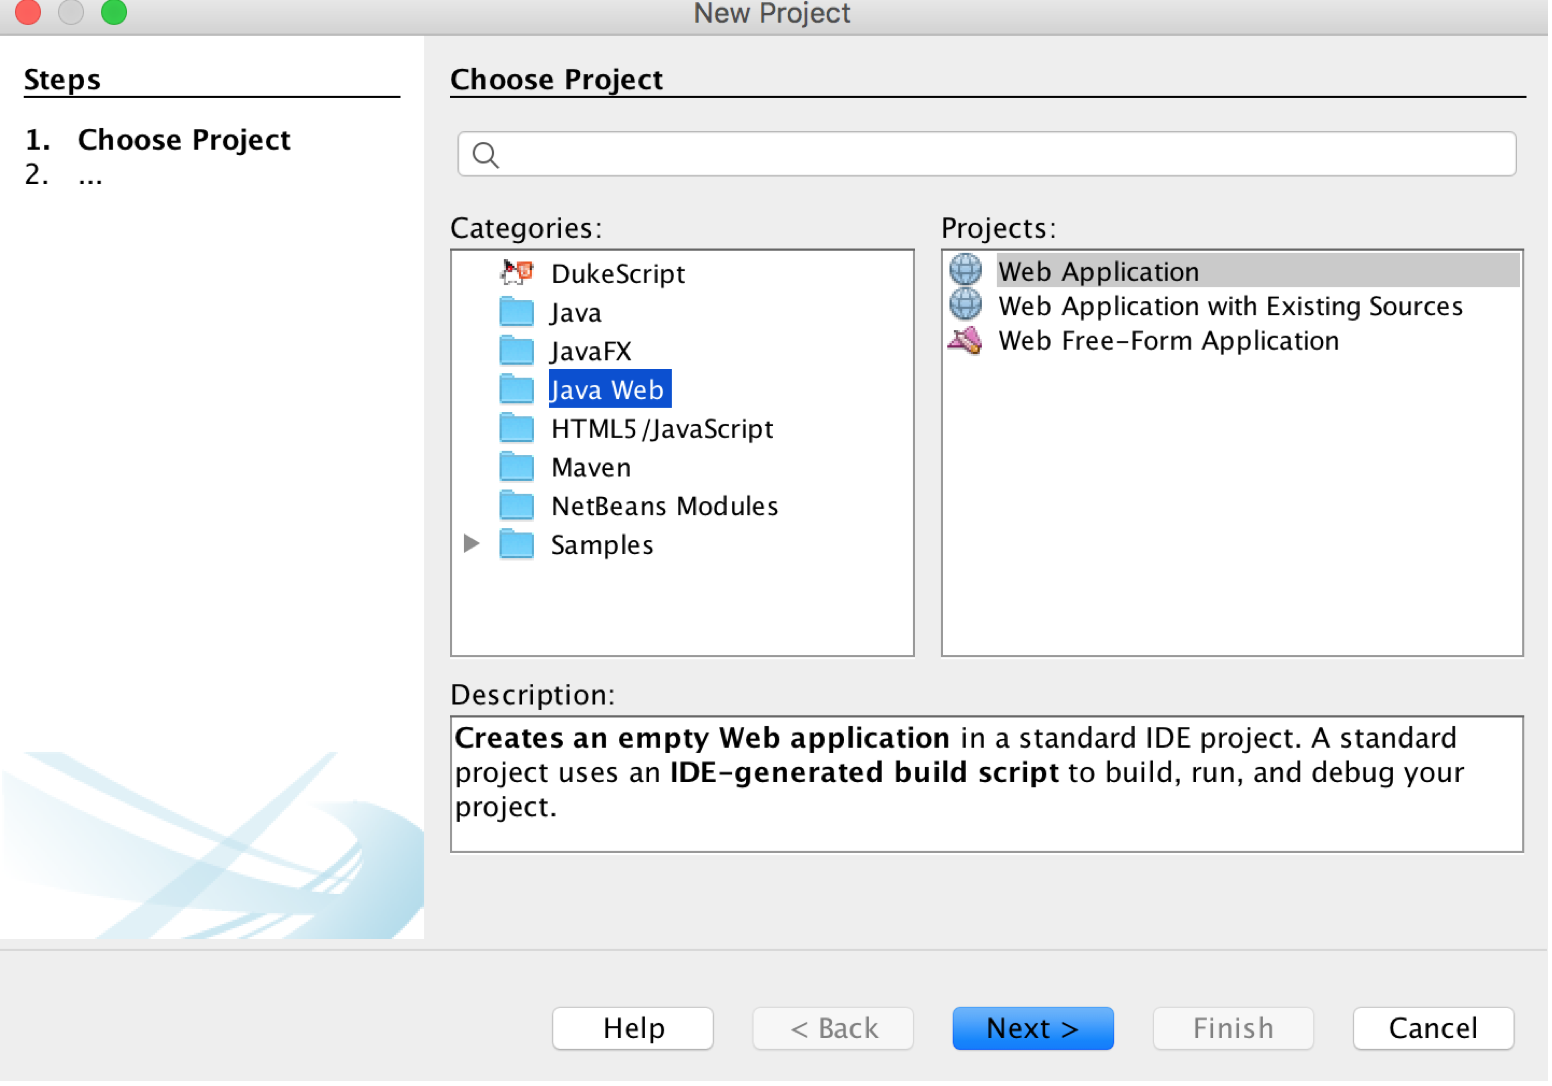
Figure 2 – Creating web application
Name the project as “AccountService” and click “Next” button to proceed.

Figure 3 – Naming the project
Then select “GlassFish Server” as the server for running the application and click “Finish” button.
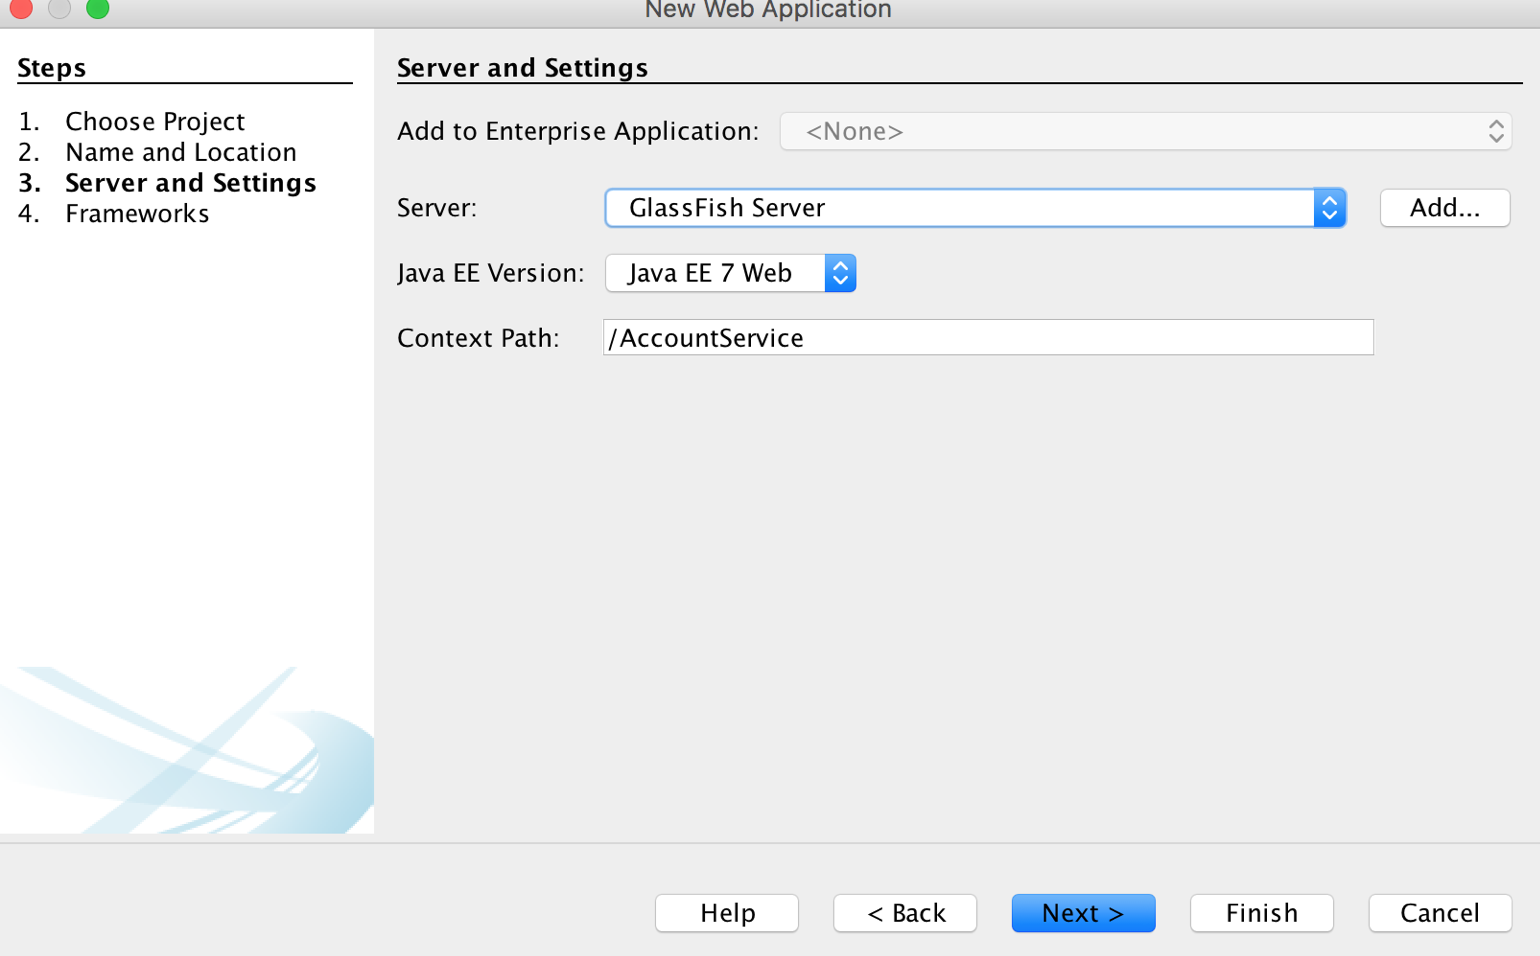
Figure 4 – Selecting server
This will create a basic web application with a simple HTML page. We do not worry about the UI for this project as we are only interested in running the web service.
Now select the project name and right click on it and select “New” and then “Web Service…” as below:
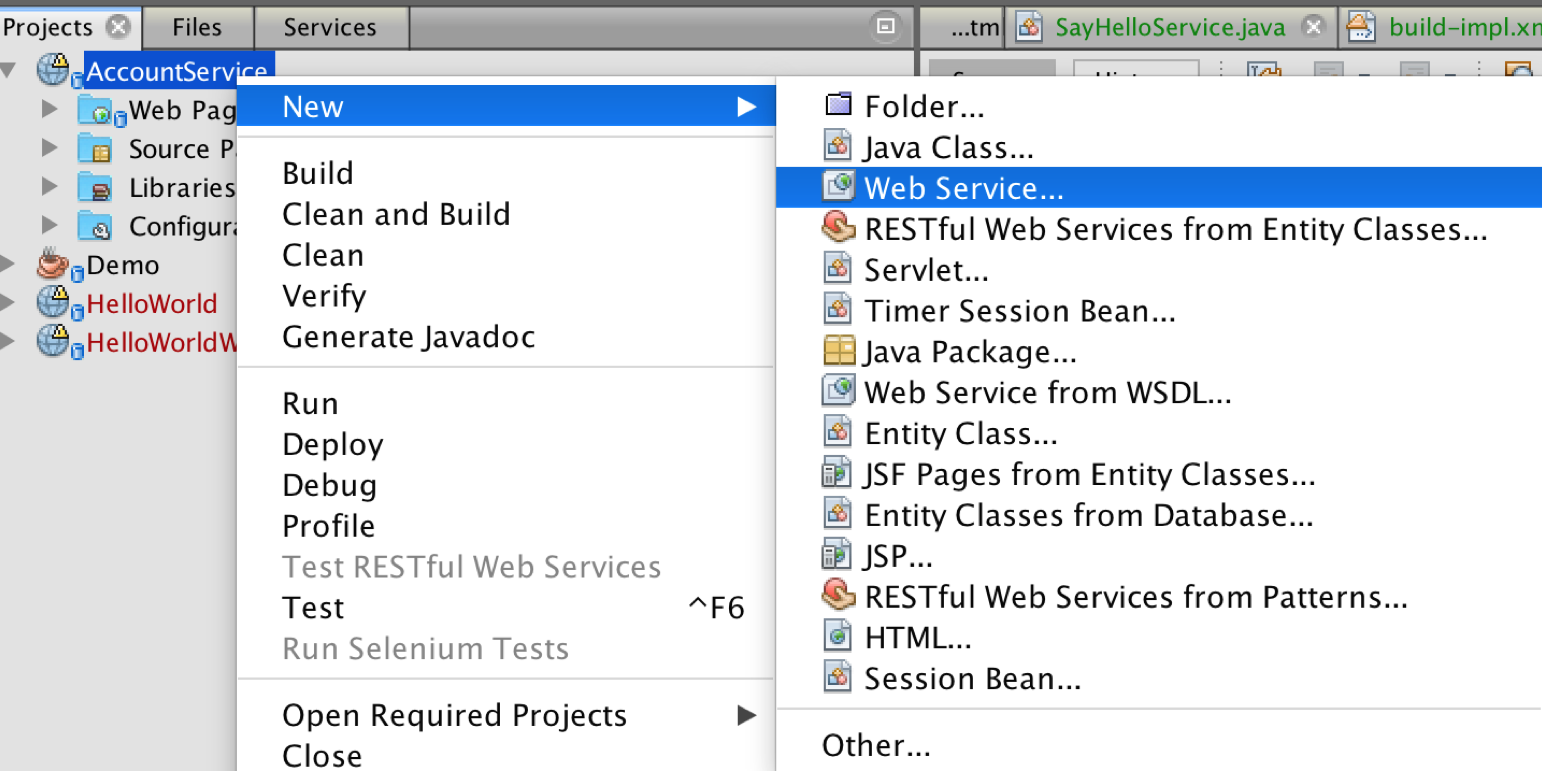
Figure 5 – Creating Web service
Name the new web service as “AccountWebService” and enter package name and make sure that the radio button selected is for option “Create Web Service from Scratch” as we want to build web service from scratch and finally click the button “Finish”.
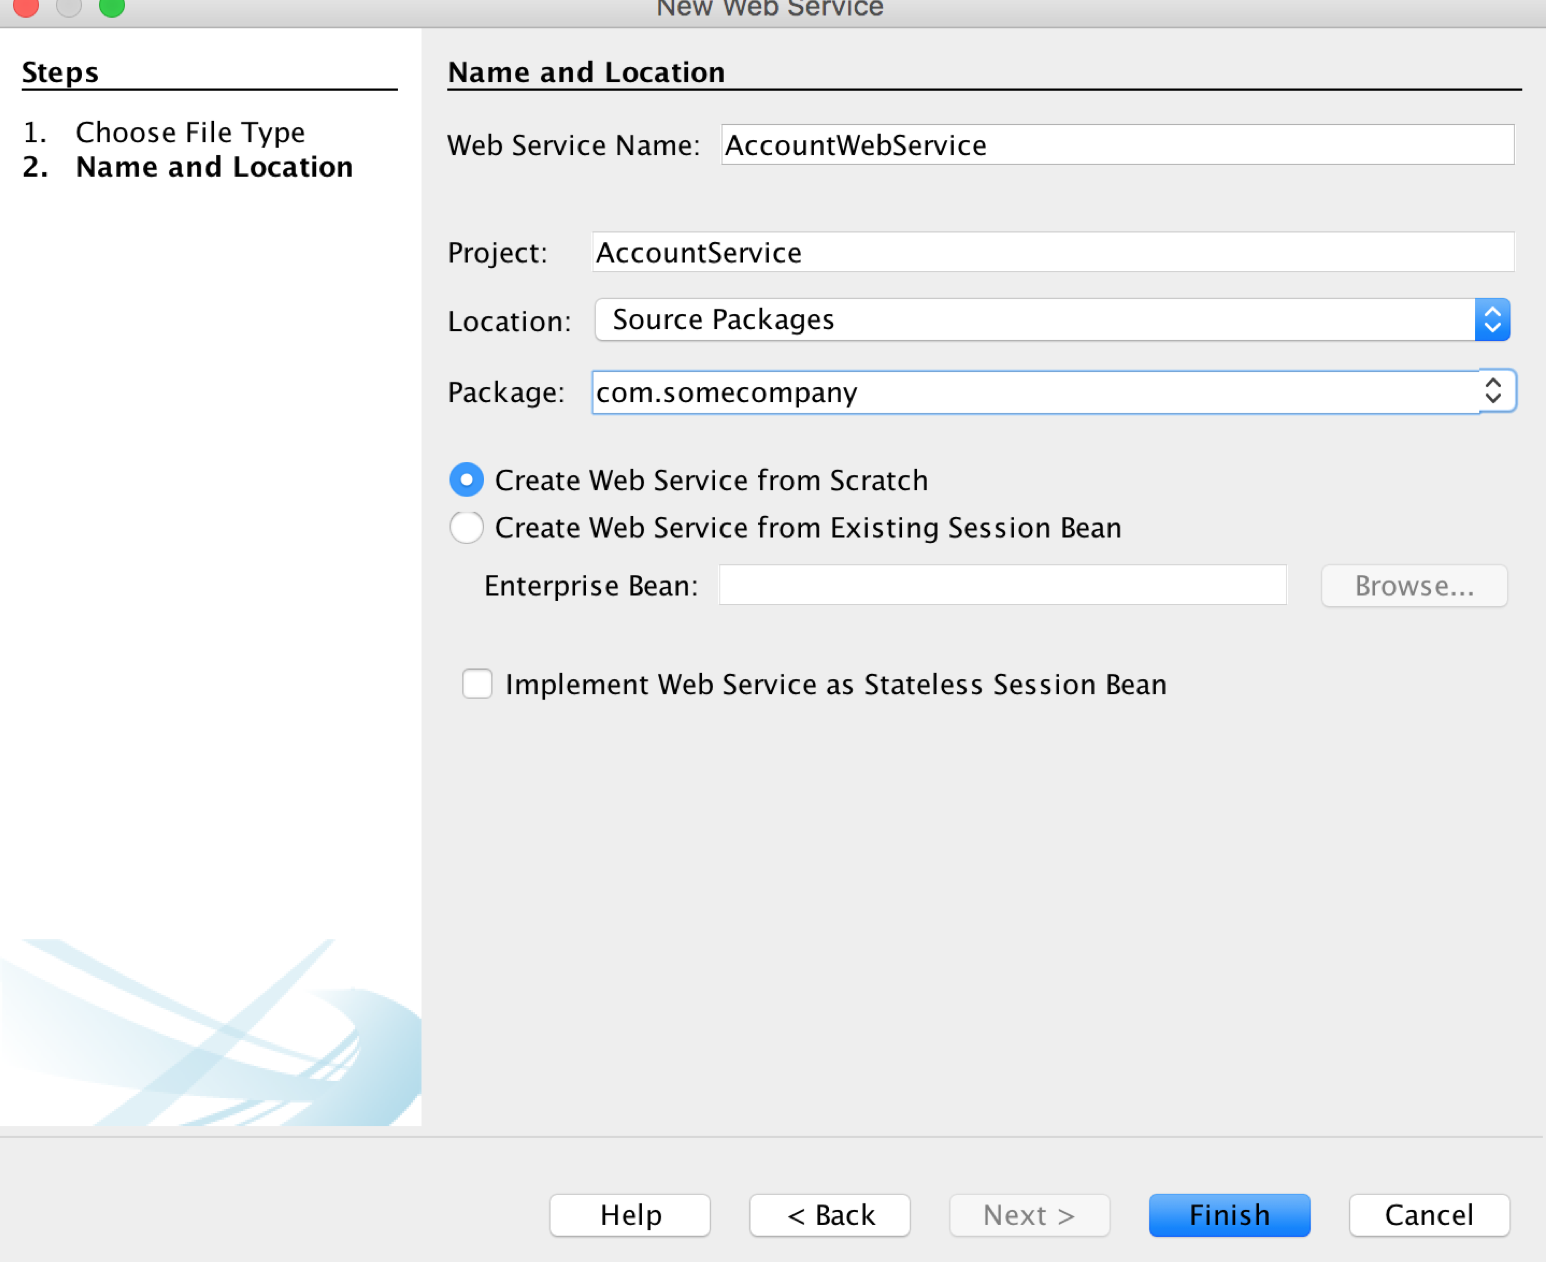
Figure 6 – Enter Web service name and Package name
Now you should see a basic web service got created and looks like below:
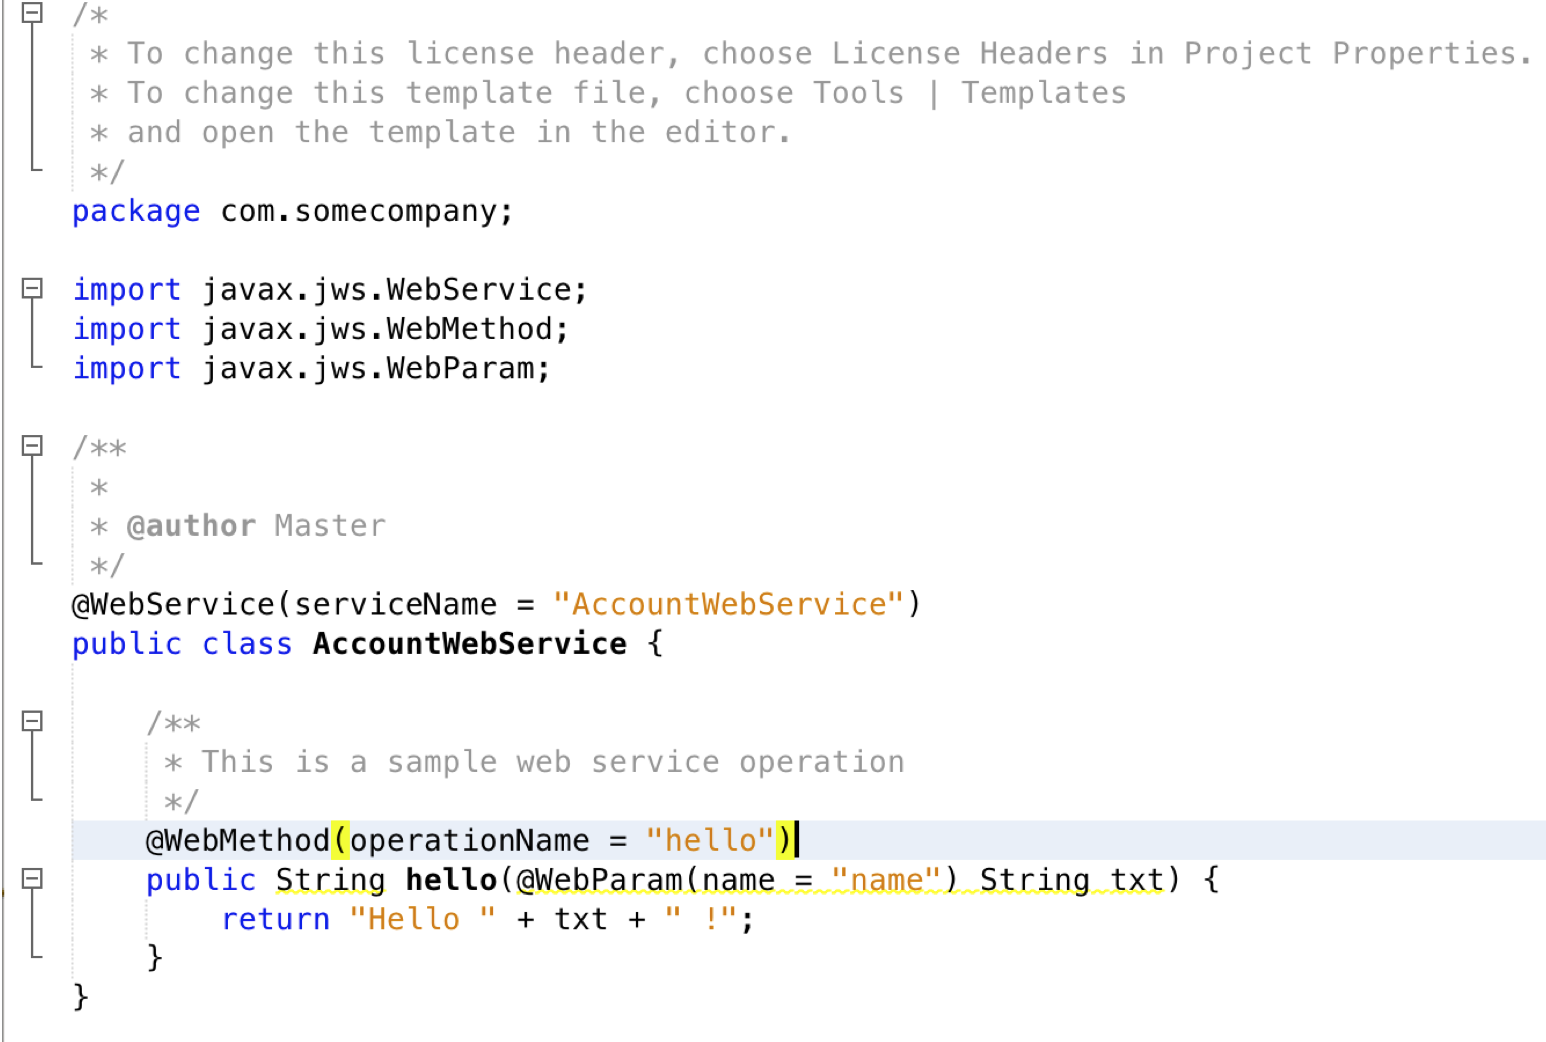
Figure 7 – Basic web service class created
Now we will make some modifications to the default code. Before doing modifications, we need to create a new Java class.
Go to “Source Packages” and expand “com.somecompany” (package name may differ based on what you have entered” and right click on the package name and select “New” followed by “Java Class…”.

Figure 8 – Creating Java Class
Enter the class name as “Accounts” and click the button “Finish”. You should see a class getting created. Now we need to add some properties in the class.
I have added fields and getter/setters for the fields and the class file looks like below:
package com.somecompany;
public class Account {
    private int returns;
    private int balance;
    private String accountNumber;
    private String customerName;

    public String getAccountNumber() {
        return accountNumber;
    }

    public void setAccountNumber(String accountNumber) {
        this.accountNumber = accountNumber;
    }

    public int getBalance() {
        return balance;
    }

    public void setBalance(int balance) {
        this.balance = balance;
    }

    public int getReturns() {
        return returns;
    }

    public void setReturns(int returns) {
        this.returns = returns;
    }

    public String getCustomerName() {
        return customerName;
    }

    public void setCustomerName(String customerName) {
        this.customerName = customerName;
    }
}
Now go back to “AccountWebService.java” class and do the following modifications:
package com.somecompany;
import javax.jws.WebService;
import javax.jws.WebMethod;
import javax.jws.WebParam;
@WebService(serviceName = "AccountWebService")
public class AccountWebService {
@WebMethod(operationName = "getAccountDetails")
public Account getAccountDetails(@WebParam(name = "name") String customerName) {
	Account account = new Account();
	account.setAccountNumber("12345");
	account.setBalance(10000);
	account.setReturns(500);
	account.setCustomerName(customerName);
	return account;
	}
}
Now right click on the project name and select “Clean and Build”.
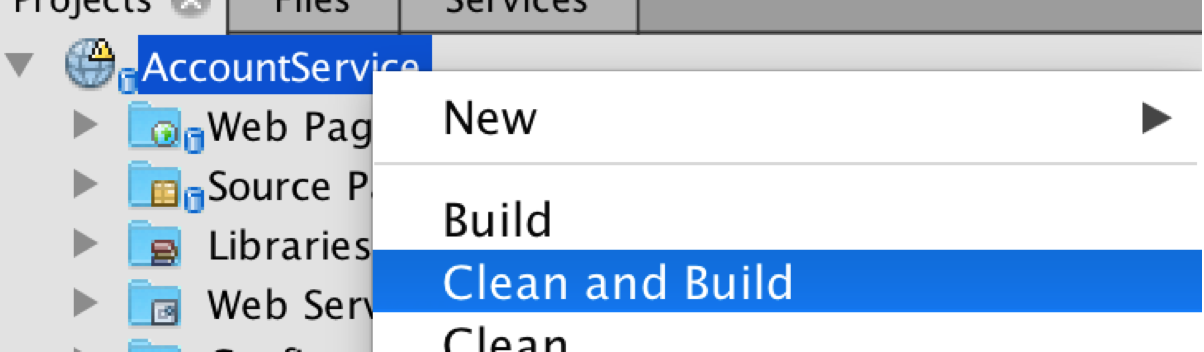
Figure 9 – Clean and Build
Now select the project name and right click and select “Run”.
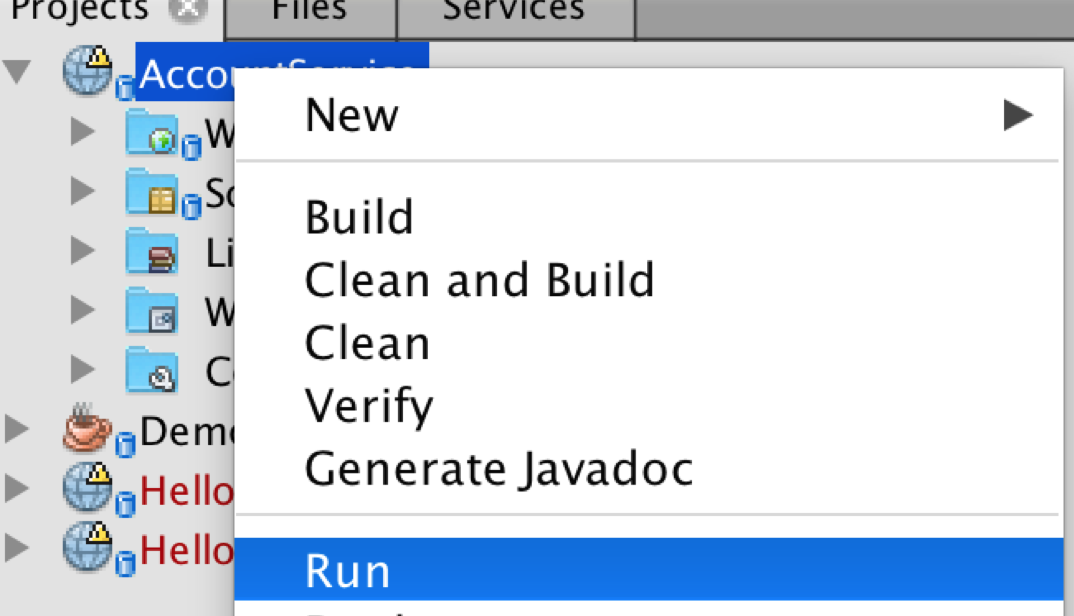
Figure 10 – Run the project
Now it should open a browser with text “TODO write content” as it was the default text.
Also in the output window, you should see the following log:
Thu Feb 08 18:52:48 CST 2018 : Security manager installed using the Basic server security policy.

Thu Feb 08 18:52:48 CST 2018 : Apache Derby Network Server - 10.11.1.2 - (1629631) started and ready to accept connections on port 1527
Now navigate to “Web Services” and expand and right-click on the “AccountWebService” and select “Test Web Service” option.
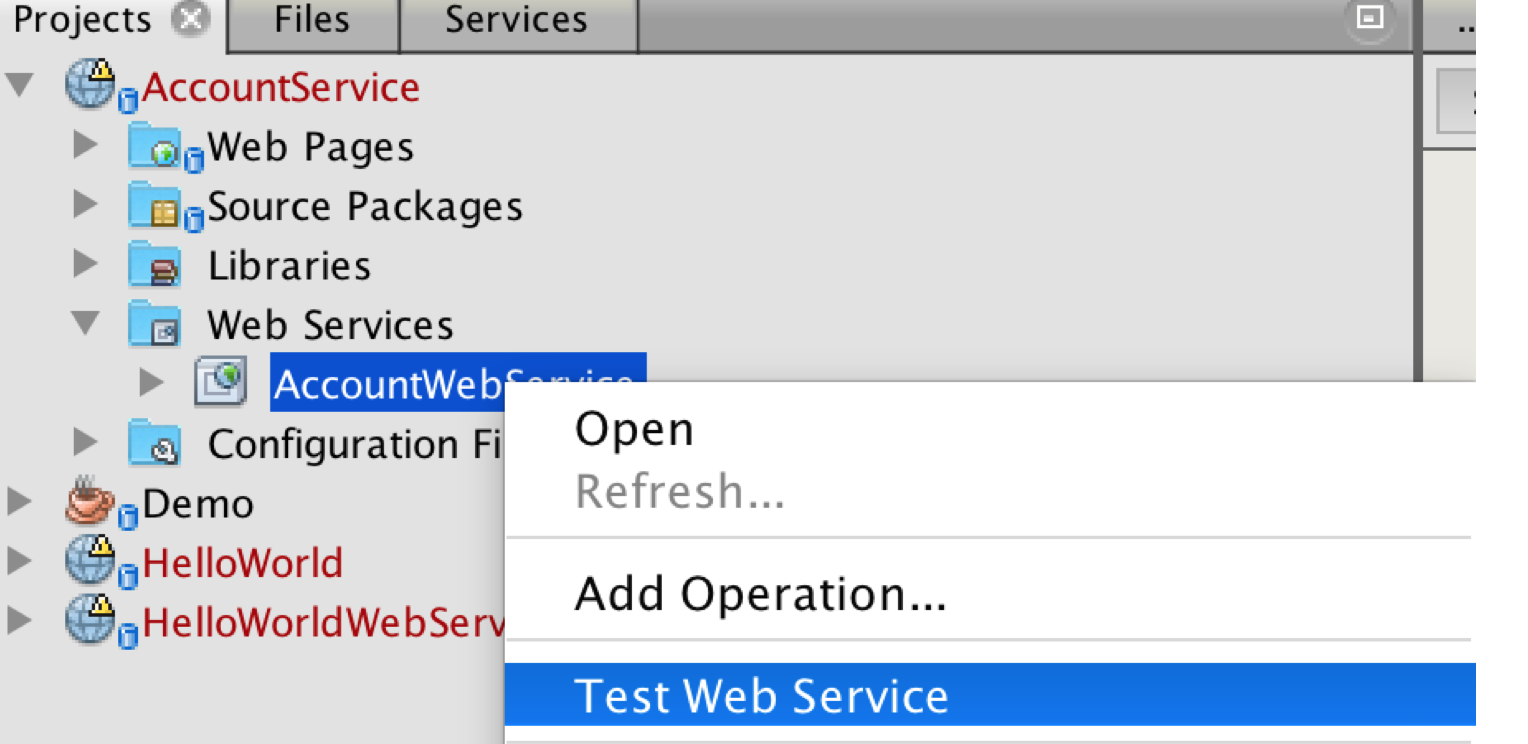
Figure 11 – Test Web Service
A new tab or window in the browser will be opened and looks something as below:
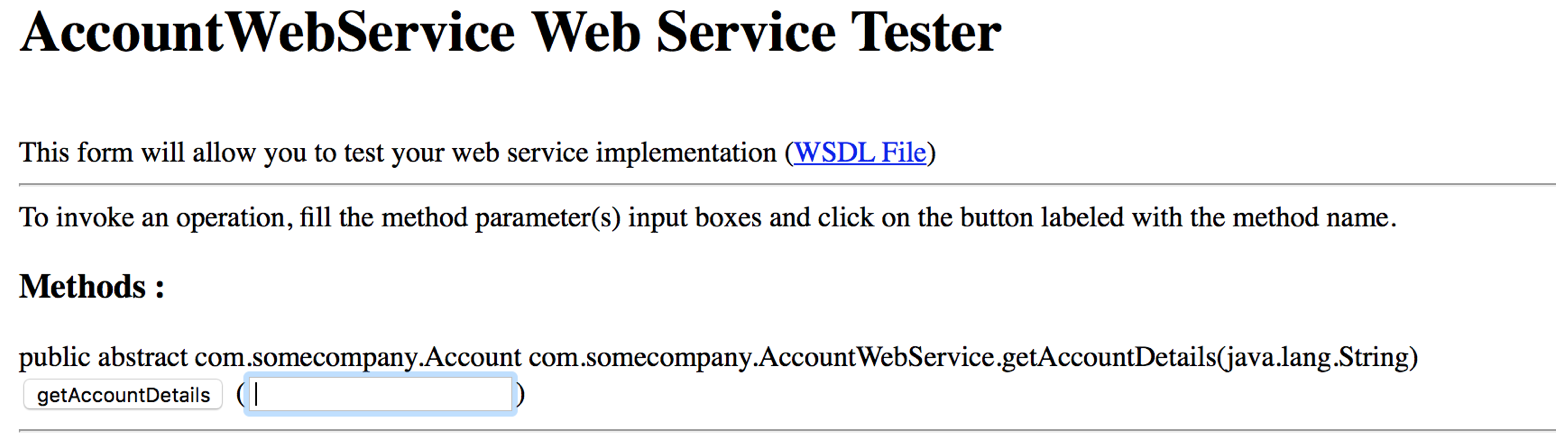
Figure 12 – Web Service Tester
This is basically to help us in testing our web service and consider this as the client for the web service. In the input box, enter customer name and click the button “getAccountDetails”. I have entered “John Sherman” and hit the button.
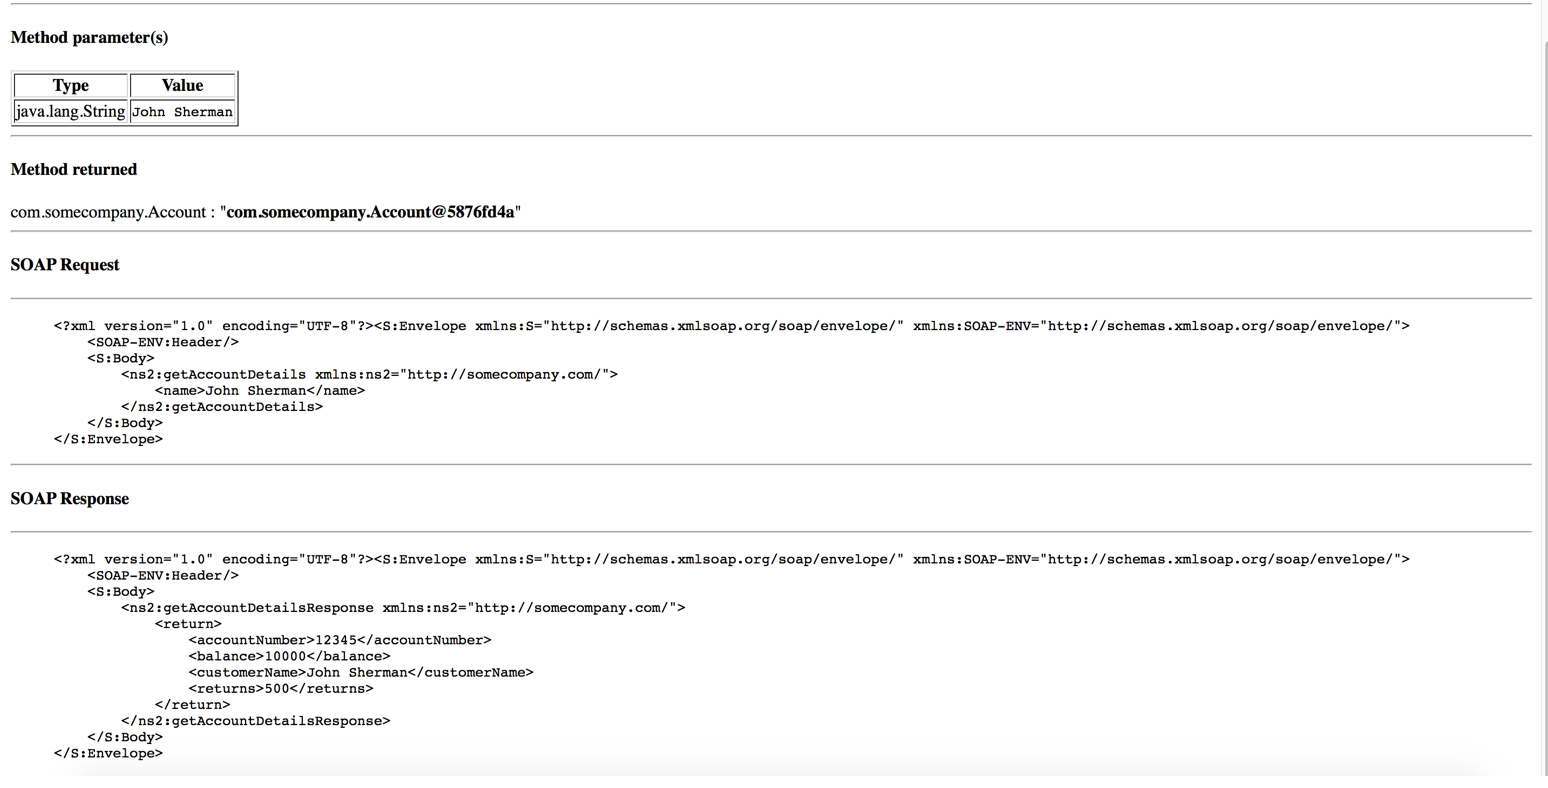
Figure 13 – SOAP Request/Response
Now you should see the SOAP Request and Response for the web service. Note in the response, the Java class properties have become the elements of the response body.
This confirms that our service is running fine and we are able to hit the service. But if we observe, the body in the response is alphabetically ordered unlike the order of fields in our Java class. Also, we do not want to display the property names as the element names. In order to do that we need to take help of JAXB.
Go back to the class “Accounts.java” and do the following modifications:
Import the following libraries:
import javax.xml.bind.annotation.XmlElement;

import javax.xml.bind.annotation.XmlRootElement;

import javax.xml.bind.annotation.XmlType;
Then decorate the class name with the following notations. We are telling that the root element name would be “CustomerAccount” and the properties order should be customerName first, then returns, then balance and finally the accountNumber. The order was intentionally specified to test if the SOAP response obeys the order that we specified.
@XmlRootElement(name="CustomerAccount")

@XmlType(propOrder = {"customerName","returns", "balance", "accountNumber"})
Decorate the get properties with @xmlElement to change the element names as below:
@XmlElement(name="AccountNumber")

public String getAccountNumber() {

return accountNumber;

}


@XmlElement(name="Balance")

public int getBalance() {

return balance;

}


@XmlElement(name="Returns")

public int getReturns() {

return returns;

}


@XmlElement(name="CustomerName")

public String getCustomerName() {

return customerName;

}
Overall class should look like below now:
package com.somecompany;

import javax.xml.bind.annotation.XmlElement;

import javax.xml.bind.annotation.XmlRootElement;

import javax.xml.bind.annotation.XmlType;


@XmlRootElement(name="CustomerAccount")

@XmlType(propOrder = {"customerName","returns", "balance", "accountNumber"})

public class Account {

private int returns;

private int balance;

private String accountNumber;

private String customerName;


@XmlElement(name="AccountNumber")

public String getAccountNumber() {

return accountNumber;

}


public void setAccountNumber(String accountNumber) {

this.accountNumber = accountNumber;

}


@XmlElement(name="Balance")

public int getBalance() {

return balance;

}


public void setBalance(int balance) {

this.balance = balance;

}


@XmlElement(name="Returns")

public int getReturns() {

return returns;

}


public void setReturns(int returns) {

this.returns = returns;

}


@XmlElement(name="CustomerName")

public String getCustomerName() {

return customerName;

}


public void setCustomerName(String customerName) {

this.customerName = customerName;

}

}
Now run again and test the web service. You should see that the order of the XML elements are changed as well as the name of the elements.
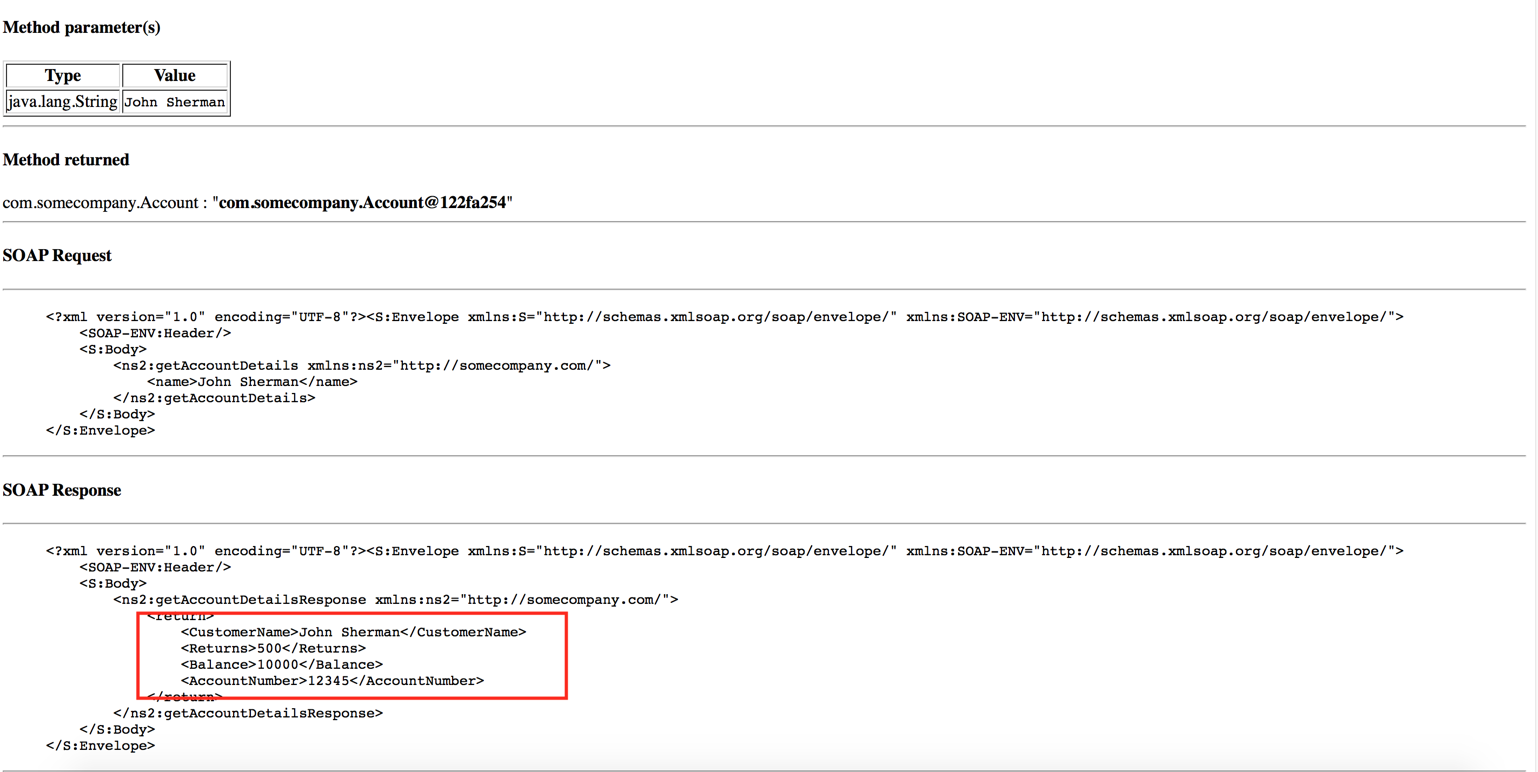
Figure 15 – SOAP Request/Response